bookmark_borderHow to Have a “Zero Waste” Thanksgiving 🦃

Hey earth muffins! I am officially home to celebrate Thanksgiving with my family – and I am so excited! 🎉 Thanksgiving is one of my favorite holidays as I get to do two of my fave things: hang with my family and eat all day. 😂 Ever since starting my journey towards living zero waste, I have been writing posts about how to reduce waste on holidays (check out my Halloween, Valentine’s Day, Mother’s Day, and Father’s Day posts!)… In honor of this Thursday, I thought I would share some tips on how you can reduce waste this Thanksgiving!

~Avoid unnecessary packaging at the grocery store when you do your holiday shopping. I suggest checking out the bulk bins for some great savings or buying loose produce for your meal! You could even challenge yourself to make everything from scratch like the pumpkin puree for your pumpkin pie! If you have to buy something in packaging, choose glass or metal containers that can be easily recycled. 👍

~Have a vegetarian dinner. Turkey is such a classic for Thanksgiving, but you could always try having a meatless holiday feast! The meat industry is pretty terrible in terms of both sustainability and ethical practices, so avoiding turkey is a great way to share these beliefs. This is obviously not for everyone as I know my own family would never not have a bird, but maybe your family would be okay with it!

~Know how many people you are cooking for! While having some leftovers is a good thing, you don’t want to have so many leftovers that you end up throwing a lot away after a few days. 👎 Keeping serving sizes in mind is a great way to reduce food waste this Thanksgiving.

~Set up a designated compost bin and keep it nearby when cooking. When you are cooking this holiday, make sure to put all of the food scraps into a compost bin! This is especially great if you are preparing food for a good amount of people, as you will be shocked to see how much compost you have been throwing away all these years. After dinner you can put the compost into your own compost bin or have someone take it to theirs (or to drop off at a local composting company).

~Use “fancy” table settings. I’m talking the whole nine yards: fancy dishes, cloth tablecloths and napkins, nice silverware, etc. If you are hosting and don’t have enough supplies, ask you family and friends to bring some along! While you will then have to wash everything at the end of the night, you will be saving a ton of waste from heading to the landfill. Worth it!

~Plan what to do with the leftovers! After a couple of days after Thanksgiving my family definitely gets tired of the same leftovers… So make a plan on what you are going to do with the leftovers! You could freeze some turkey to put in soups, turn vegetable dishes into a casserole, etc. etc. By having a plan you will be less likely to just throw away the food after a few days. 🙂

How do you reduce waste on Thanksgiving?

Love,
Jenna ♥

➡️ Subscribe to never miss a post! ⬅️

Loading

bookmark_borderReview: Clean Faced Cosmetics Zero Waste Cake Mascara

When I wrote my review of Mad Hippie’s Mineral Mascara last month, I referenced the other mascara that I use on a day-to-day basis and realized that I have not written a full review of it yet… I have been using a mascara from Clean Faced Cosmetics for a couple of years now, so I thought today would be a perfect day to share my Clean Faced Cosmetics cake mascara review! 

What I Love:
*It is sustainable! This was one of the first switches I made when I started my green journey back in May 2018. The mascara comes in a metal tin, can be sent back to the Etsy seller to be refilled, and comes in zero waste packaging. I also use a powder from this shop (see the full review here!), and I love that the seller will ship a compostable bag of the product instead of using another tin.

*Made of only 4 ingredients – As you all know I try to keep the ingredient count down on all the products I use, as I’m not a fan of chemicals or putting things on my body that shouldn’t really be there…. So I LOVE that this product is made with less than 5 ingredients!

*Good pigmentation and color – It is not super duper black (even though it is buildable if you want a dark black), which I love because I usually do a natural makeup look.

*Lasts all day and is easy to get off in the shower! I mentioned in my Mad Hippie mascara review that I didn’t like how I had to actually try to get this mascara off in the shower. I love this Clean Faced Cosmetic mascara because it is easy to get off with just water but lasts all day long.

*It is multi-purpose – Because this mascara is in cake form, it allows it to be used as both a mascara, eyeliner, brow filler, and even eyeshadow! I typically just use it as mascara and eyeliner, which saves me from creating more waste than I need to! 👏

*Easy to apply! Cake mascara might seem harder to apply compared to those in tubes, but it is actually super simple.

*Comes with a TON of product – Especially if you use a small amount each day like me, this product will last you a long time.

*Supports a local business – Laura, the lovely lady who owns the Etsy store, is from Grand Rapids, MI. I love that I am able to support a local Midwestern!

*Easy to sanitize! Mascara wands can get pretty nasty and collect bacteria, so I love to sanitize my cake mascara by spraying it with some rubbing alcohol every once in awhile. You definitely can do this with typical plastic containers!

What I Don’t Love:
*A bit pricey – Compared to cheaper drugstore products (like elf, NYX, Wet n Wild, etc.) this mascara is more expensive… But for $16 (and usually the shop has some awesome sales!), it is definitely worth it!

*Learning curve – While applying cake mascara is easy, it will require you to learn how to do so if you have been using wand mascaras for your whole life. Not a big con, but I thought I would still add it to the list. 😬

Thanks for reading my Clean Faced Cosmetics cake mascara review! What is your favorite mascara currently? 

Love,
Jenna ♥

➡️ Subscribe to never miss a post! ⬅️

Loading

bookmark_borderThe Weekender’s Guide to Cleveland, Ohio: What To Do & Eat on the East Side! 🥰

Hey earth muffins! A couple of weekends ago, I went to Cleveland to visit one of my college friends. She lives in a suburb on the East Side of the city and was kind enough to show me around for a few days. It was so much fun to explore with her, so I thought I would share another weekender’s guide with you all (especially since you have loved my guides for Madison (WI), Fort Wayne (IN), Bar Harbor (ME), and Washington D.C.). 😊

What To Do:
1. Visit the Cleveland Museum of Art – My friend is a huge art buff, so it was great to explore this museum with her as she knew so many fun facts about certain paintings and artists! For a free museum, it has SO much art it in from ancient Egyptian sculptures to modern art. Plus, they have some extremely famous art from Monet, Degas, Picasso, Rembrant, etc. 🎨 We were lucky enough to witness a couple get engaged in front of a Monet painting, which was definitely the cherry on top of this museum trip!

2. Walk around Little Italy – Your girl right here is Italian, so of course I had to check out Little Italy! It was so cute and fun to walk around; see my Italian dessert suggestions in the section below. 😉

3. Drive through the gorgeous neighborhoods of Shaker Heights – This might be odd, but I absolutely love to drive through residential neighborhoods when I am visiting new places! There are some gorgeous (and huge) houses in Shaker Heights, so I would definitely recommend driving around if you are into that sort of thing.

A picture of a house in Shaker Heights, Cleveland

4. Walk around University Circle – At the heart of the East Side of Cleveland is University Circle which has many museums (the art museum is here!) and colleges (including Case Western). It is a great place to cover some ground on foot.

5. Spend time in the Botanical garden – I was in town when the weather was just starting to turn cold, so I wasn’t able to embrace any nature inside the garden… However, I would definitely recommend checking it out if you are searching for some calm in the city. 🦋

6. Find some famous graves in the Lake View Cemetery – President Garfield, John Rockefeller, and many other people are buried here. There is free parking on the side of the street next to the cemetery on East 123rd Street, which is a great place to park if you are going to walk around Little Italy or University Circle!

What To Eat:
1. Cannoli from Presti’s Italian Bakery – Cannoli have forever been my favorite dessert, and these were a 10/10. This place gets extremely busy, so make sure you take a number when you enter so that you save your spot in line. 😄 They have huge portions for a reasonable price, making it a must stop!

A picture of a display case in Presti

2. Peppermint Thai Cuisine – This restaurant is located over in the Pepper Pike suburb, so if you find yourself nearby I would definitely recommend. The food is healthy, delicious, and a great price! The teriyaki salmon was amazing, and my friend (and her family) order food from this restaurant all the time (which shows you just how good it is!).

3. Mitchell’s Ice Cream – Good ice cream is a staple whenever I travel, so I love that this brand is local to Ohio. They have traditional flavors but also some out of the box ones, making it perfect for everyone in the family! 🍨

What are your favorite things to do on the East Side of Cleveland?

Love,
Jenna ♥

➡️ Subscribe to never miss a post! ⬅️

Loading

bookmark_borderWhat is “Planned Obsolescence”? & How To Avoid It

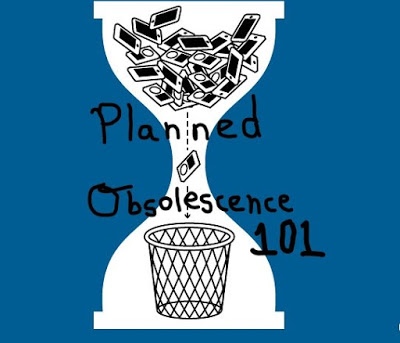
Hey earth muffins! Today I wanted to talk about a topic that I have noticed much more during my journey towards living zero waste: planned obsolescence. 🤔 Let’s jump right into it!

A picture of a pile of phones getting thrown into the trash with the words Planned Obsolescence 101 across the center of it
Pin to read later!

What is Planned Obsolescence?
“Planned obsolescence” is the term used when goods are produced in a way that will become obsolete in the near future (usually about 2 – 4 years). This requires the consumer to replace the good when it becomes obsolete. Some examples of planned obsolescence make sense; in fashion, nylons are going to run after a certain point and will need replacing. However, planned obsolescence has become more prevalent and is often used by companies to maintain revenues across the years. Think about Apple: their iPhones only last a few years when more sturdy phones could actually last decades.

Why is Planned Obsolescence bad?
Let me make this clear – not all forms of planned obsolescence are bad. Often times, this practice can help with technological improvements. But, there are many negatives as well:

*Costs the consumer (YOU!) more money because you have to keep buying replacements
*Results in lower quality goods – if it is made to break in 2 – 3 years how good can it really be?
*Creates unnecessary and excess waste going to landfill 😥
*Reinforces our “throwaway-able” culture – just like fast fashion has ruined how we see and value our clothes, products that become obsolete strengthen the way we view material goods as something that will be in our lives for a short time and then get replaced. See previous reason on why this is bad.
A cartoon about planned obsolescence

What can you do to avoid Planned Obsolescence? 
1. Only buy the best of the best: Do research before buying products to make sure they will last you a long time. Many brands advertise that their products last a lifetime because they actually might! Definitely prioritize supporting brands that make these higher quality items.

2. Repair it instead of buying new: I’ve personally had my iPhone 6 since junior year in high school instead of forking out money to purchase the latest and greatest iPhones. It does what I need it to do (text and call people, check email, etc.) so that is good enough for me!

3. Don’t buy into everything advertisements are trying to sell you: Trying to live sustainably has really helped me on this one, as it is easy for me to refuse products that I don’t need and won’t last.

4. Buy used or antique: How many times have you seen your grandma use an old cooking dish from the 60’s? Those goods were always made to last so try to buy those instead!

What are your thoughts on planned obsolescence?

Love,
Jenna ♥

➡️ Subscribe to never miss a post! ⬅️

Loading

bookmark_borderRecipe: The EASY Way to Make Fresh Pumpkin Puree

Hey earth muffins! My absolute favorite cookies are pumpkin chocolate chip, so I am a huge fan of pumpkin spice season. When grocery shopping a couple of weeks ago, I saw that pie pumpkins were on sale… 🎃 So I thought it would be fun to try to make my own pumpkin puree! Thanksgiving is coming up soon, so this recipe would be perfect for your delicious pumpkin pies (and of course any other pumpkin-themed baked good). Let’s jump right into the recipe!

A picture of a bowl of orange fresh pumpkin puree with the words Easy Pumpkin Puree around the bowl
Pin to read later! 

What You Need
-Pie pumpkin(s): I used two small ones which made about 2.75 cups of puree
-Large spoon
-Large knife
-Baking tray (must have some sort of lip)
-Water
-Blender (or some sort of Nutribullet)

What To Do:
1. Preheat the oven to 350 degrees.
2. Using the knife, cut off the stems of the pumpkins. Be careful you don’t cut off any fingers!
3. Cut the pumpkin in half lengthwise.


4. Use the spoon to scoop out the seeds and stringy bits in the middle of the pumpkin. I suggest roasting the seeds as a tasty snack and then composting the rest! 😊
5. Place the pumpkin halves FACE DOWN on the baking sheet. Add about 1/4th of an inch of water to the bottom of the pan.
6. Pop into oven and let bake for 60-90 minutes. The pumpkins are done when a fork can slide in easily (mine took about 65-70 minutes).
7. LET COOL!
8. Scoop out the pumpkin “meat” and put into the blender. Blend until smooth.
9. If your pumpkins were a bit watery, you can drain some of the water out to get a thicker puree consistency. You can also add some water if it is too thick. My pumpkin puree was absolutely perfect straight from the blender, so I skipped this step.
10. Either use in a recipe right away, pop it into the fridge to use up within a few days, or freeze it. As I wanted to be able to use the puree for cookies throughout the year, I measured it into 1 cup portions and froze in mason jars. 😀 Ta-da! Your pumpkin goodies are just waiting to be baked!!

What are your favorite pumpkin recipes?

Love,
Jenna ♥

➡️ Subscribe to never miss a post! ⬅️

Loading