bookmark_borderAwesome Things To See and Do: A Weekend Travel Guide to Austin, Texas

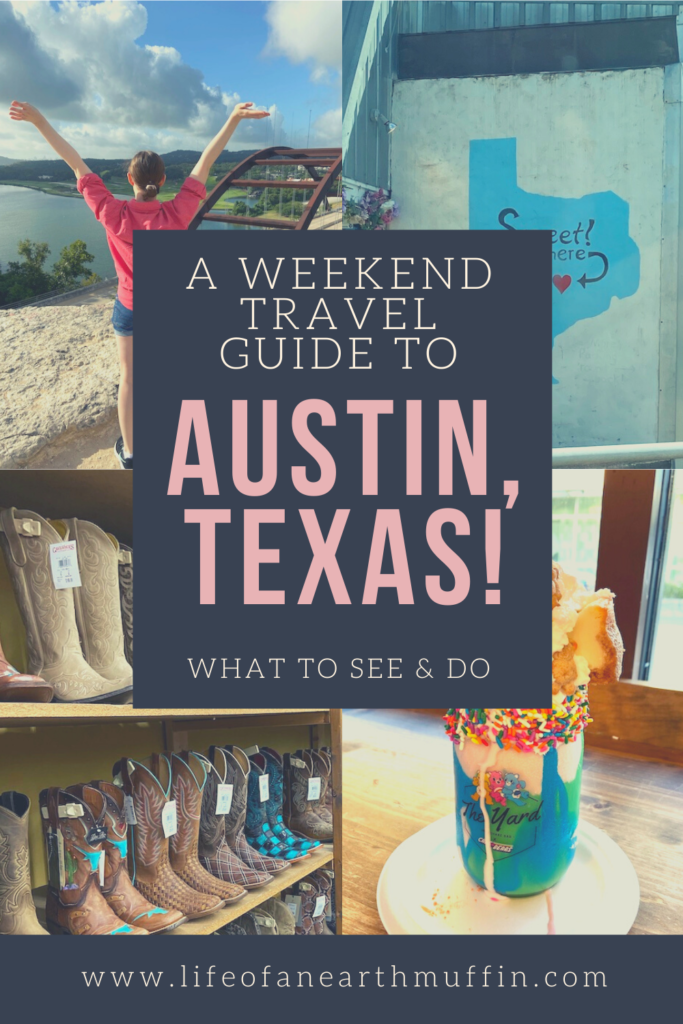
Hey earth muffins! If you follow me on Instagram, you will know that I took a trip to Austin, Texas last month. It was my first vacation in almost two years – it felt so weird traveling after the pandemic! I was only in Austin for about four days, but I hit up a lot of fun places. As I haven’t written a travel guide post in awhile, I thought I would share my travel guide to Austin with you all today. Here are my recommendations for what you should see and do in the great city of Austin, Texas! 🤠

Fun Things to Do in Austin, TX

Hit up some bars downtown! Austin is known for having a great nightlife scene; however, I am not really into that… So, I didn’t actually go to any bars downtown. However, it is still fun to walk around the city regardless! If you want to see an old hotel (and use a public bathroom), I suggest hitting up the Driskill Hotel. It is super pretty! The area around it has a few shops and a Voodoo Donuts as well.

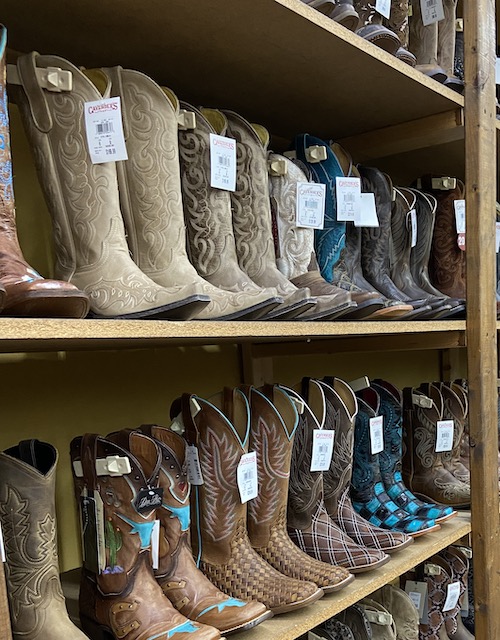
Go shopping on S. Congress street. In the actual downtown portion of Austin, there are plenty of restaurants but not much shopping. If you are looking for some cute shops, I suggest heading to the trendy S. Congress street area. They have everything from cowboy boot stores to vintage and cutesy art shops. One of the coolest shops in this area is Lucy in Disguise with Diamonds, a huge costume store with so much interesting stuff!

A picture of cowboy boots inside a boot store in Austin Texas

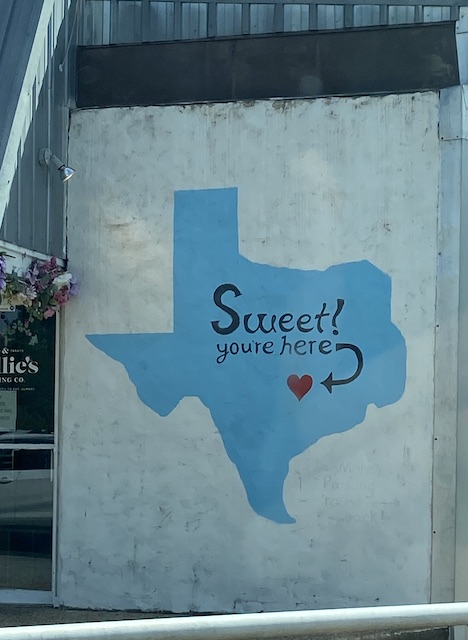
Take some pictures at Austin’s many murals! I’m not one to drive around for Instagram photos, but there are definitely plenty of opportunities for Insta pics in Austin. I just had to add this in my travel guide to Austin, as I know many peope love a good mural pic!

Drive through Hill Country. Texas is absolutely beautiful. (Hot, but gorgeous views.) There is a famous lookout spot called Mount Bonnell that has a great view of the city of Austin as well as the Colorado River. To get there, you have to drive through some affluent neighborhoods – I spotted around 20 Teslas in only five minutes! I was impressed at how beautiful Hill Country actually was, so I would highly suggest driving around it for a bit.

Go see some bats at dusk! 🦇 The “Bat Bridge” in downtown Austin has a gigantic population of bats that live underneath it. At dusk, they fly out for the night which has become a popular spectacle for tourists and locals alike. The timing of when the bats emerge is different each night, so I suggest bringing a picnic blanket and some snacks as you wait.

Tasty Things to Eat in Austin, TX

Bananarchy food truck in Austin, Texas

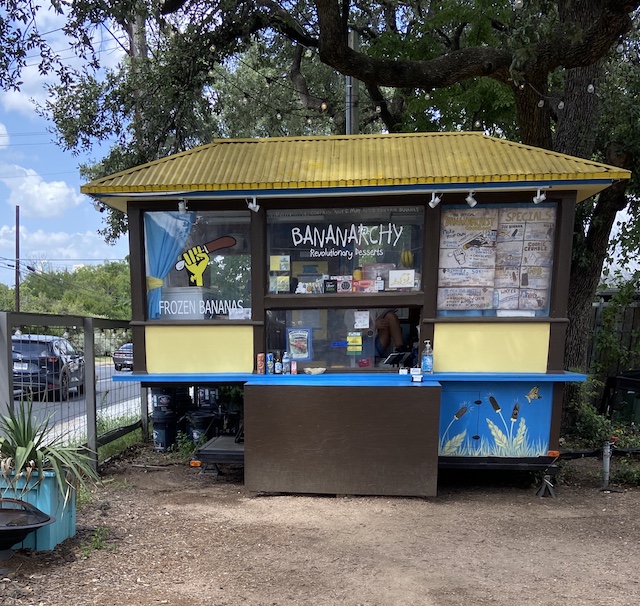
Get yourself a frozen banana at Bananarchy. This food truck has three different locations across the city – and I totally recommend going at least once! The truck sells frozen bananas dipped in anything you can imagine. You can either build your own (with a sauce, drizzle, and topping) or get a combo that has already been created. I’ve shared my frozen banana snacks recipe before, and this is an amped up version of that. So perfect for a hot Texas day.

Eat some Torchy’s Tacos! I am a huge fan of Mexican food, and I try to get it whenever I travel. Austin has a huge taco scene and a lot of great Mexican restaurants. Torchy’s is a chain that has some delicious food! Their queso dip is really good, and the tacos are excellent as well. 10/10 would recommend to a friend!

A Cheer Bear milkshake from The Yard in Austin Texas

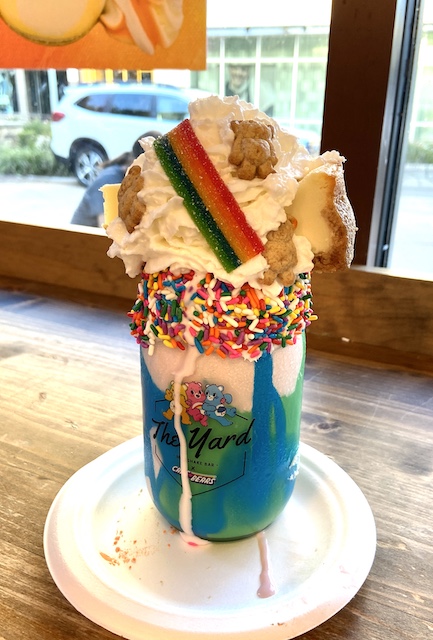
Get yourself a gigantic milkshake at The Yard. This place was on Shark Tank and sells massive milkshakes… How could I not add this to my travel guide to Austin? Be prepared for a long wait – the one I ordered took about an hour to come out due to a crazy amount of people at the store. But, it is located in a cute shopping area, so just go shop while you wait to pass the time. I personally loved that the milkshake came in a collectible glass jar, and I can’t wait to add it to my mason jar collection!

Final Thoughts on Austin, TX

Pin now to read later!

I hope this was a helpful travel guide to Austin, Texas! 🤠 There is a lot to see and do in the city (and in the area around it); it was a super fun trip that was packed full of good times. From shopping the cute vintage stores on S. Congress street to eating a too large milkshake at The Yard, the memories from this trip will last a lifetime! If you ever have the chance to visit Austin, I would highly recommend. Where have you traveled to lately? Comment below, and I’d love to hear about other fun things to do in Austin that I didn’t add to this list!

Love,
Jenna ♥

➡️ Subscribe to never miss a post! ⬅️

Loading

bookmark_borderHow to Get the Best Deals at Yard/Estate Sales!

Hey earth muffins! The fall and summer seasons are full of yard/estate sales. For someone who prefers second hand shopping, these are great places to find items you might be looking for. As you can tell from my latest collective haul, I’ve been doing quite a bit of yard sale shopping these past couple of months. In honor of it being Second Hand September, I thought it would be fun to share some of my best tips for scoring the best deals at yard/estate sales. I’ve tackled thrift shopping tips and even how to score finds on Facebook Marketplace, so I hope this post helps with another second hand shopping option. Yard and estate sales are some of my favorite places to find treasures, so I hope this is helpful to you all as well!

~Go shopping as soon as the yard/estate sales open!

The early bird truly does get the worm with second hand shopping. If a sale opens at 9 AM, I suggest getting there around that time. Not only will less people be there, but everything will still be at the sale. You get first pick from all the goodies! There is a bigger possibility that all the good items will be taken if you show up later in the day.

~Map out a route before you go.

Instead of aimlessly roaming around your city until you find a sign, I suggest having a route in mind before you go. Check out estatesales.net to scope out the major sales in your area. A lot of people advertise for yard sales on Facebook Marketplace as well. Once you have mapped out a few stops, stick to that route as you go shopping! If you find signs around the area you are driving, feel free to veer off and hit up those sales too.

~Hit up sales on the first day (for the most selection) or the last day (for the best deals).

In order to get the best deals at yard/estate sales, it is important to decide what your motive is. Are you looking for the most selection of items? If so, I would suggest going to sales on the first day they are held. And, like I mentioned above, show up right when they open too! On the flip side, if you are looking for the best prices and deals, I suggest going on the last day. Especially for estate sales, many places will do 50% off to clear out as much as possible!

~Only buy things you actually need!!

Even though you are shopping second hand, that doesn’t mean you should buy everything that catches your eye (or is a cheap price). Living a sustainable lifestyle is all about reducing your consumption – only buy what you actually need to get! I have found it helpful to have a list on my phone of everything I am looking for at the moment. From certain kitchen items to holiday decor pieces, this list stays on my notes app at all times. Whenever I am at a yard/estate sale, I’ll only buy items if they are on the list!

~Don’t be afraid to bargain with the seller.

A great way to score deals at yard/estate sales is to bargain for a lower price. This tip depends on the original pricing; if you think the prices were set too high, feel free to ask for a more reasonable one. If the prices are already fair, I would just hand over your cash. 😊 Especially since you are saving money by not purchasing an item new, sometimes it is better to support the seller with the full amount.

Pin now to read later!

Final Tips for Yard/Estate Sales!

Yard and estate sales are some of my favorite second hand places to shop. You never do know what you are going to find! In terms of getting the best deals, the timing of when you go shopping is super important. But, don’t fall into the trap of overconsumption just because – keep a running list of what you need and stick to it. What are your favorite tips for scoring deals at yard/estate sales? Comment below and share some of the recent finds you have purchased!

Love,
Jenna ♥

➡️ Subscribe to never miss a post! ⬅️

Loading

bookmark_borderI Tried Roller Skating for 30 Days! A Fun “End of Summer” Challenge

Hey earth muffins! If you read my latest collective haul post, you will know that I recently purchased myself some roller skates. I wanted to challenge myself at the end of the summer to try something new – so I attempted to roller skate for a month! In today’s post, I wanted to share the ups and downs of this roller skating challenge with you all. Let’s roll right into it!

Teal roller skates on an outdoor rink

Why Did I Want to Roller Skate? Getting the Challenge Started

I’ve never been a fan of working out, but I was feeling the need to move my body in some way at the end of the summer. While I typically opt for long walks (or trying out a Chloe Ting workout), I decided to try out something different. Roller skating sounded like a fun thing to try! I used to love hitting up the roller rink when I was in middle school. The fun music, good times with friends – what wasn’t to like? There is a park in my city that has an outdoor cemet rink, which I decided was the perfect place for the roller skating adventures to begin. As you saw in my latest haul, I picked out some skates (with outdoor wheels) and placed the order! 🛼 And no, I didn’t pick out roller skates that match the emoji… That was a total happy accident.

How Did It Go?

Once I got my skates, I incorporated roller skating into my morning routine. I didn’t go every single day but tried my best if the weather was nice. By going in the morning, the weather was cooler and I always got the rink all to myself. Outdoor skating is definitely different than indoor skating. Because the rink is made of cemet, there are hazards you don’t need to think about in a smooth indoor rink (such as cracks and loose stones). I have definitely fallen, but more on that in a bit.

Pair of teal roller skates on an outdoor rink

Skating is super fun! Practice makes perfect, so the more I go skating the better I feel. Just like with ice skating, I felt wobbly and unstable when I started – but I definitely have my “roller skating” legs now! Another thing that makes this so much fun in the morning is my roller skating Spotify playlist. I have some total bops that I listen to, including “Proud Mary” by Tina Turner, “Skate” by Bruno Mars, and “Disco Inferno” by The Trammps. Great music makes roller skating even more fun! Once I continue skating and feel even more stable, I hope to move from the rink to the bike trails/roads in my town. 😊

How To Get Up After a Fall

Know in advance that everyone falls when trying to learn to skate! I was a pretty good skater before I started this challenge, but I’ve had my fair share of falls still. The biggest crash happened about two weeks into skating… I was doing my last lap and a flat slate rock made me slip like it was a banana peel. I fell on my butt SO hard; when I got home, I started seeing little prisms of light in my left eye. While those went away after about thirty minutes, I was messed up for the whole weekend with headaches, neckaches, and fatigue. I basically had given myself whiplash for falling so hard. 😬

Once you have a big fall like that, it is difficult to get back to roller skating. Even after taking a week off to fully recover, I was still hesitant to get back on the rink. It is more of a mental game now, with the fear of falling being more present than it was before. But, I got back out there! I watched a few YouTube videos to learn better techniques against rocks and outdoor hazards when skating… Falls are going to happen, it is getting back up that makes you stronger and more resilient!

Pin now to read later!

Final Thoughts on My Roller Skating Challenge!

Overall, I would recommend you try out roller skating! It was a super fun challenge to do at the end of the summer, and I plan on continuing to skate throughout the fall. Once winter sets in, I’ll have to swap out my skates for some ice skates, as the outdoor rink gets turned into an ice rink when it gets snowy. Even in only 30 days I’ve seen a ton of improvement in my skating, and it is such a fun way to stay active! I am proud that I was able to get back out there after a huge scary fall as well. What have you been doing to stay fit recently? 🛼 Comment below and let me know if you have ever been roller skating before!

Love,
Jenna ♥

➡️ Subscribe to never miss a post! ⬅️

Loading

bookmark_borderHow to Pack a Zero Waste Lunch – Your Essential Back to School Guide

Hey earth muffins! Fall is almost here! The weather has slowly been getting colder, and I have definitely been enjoying the cooler autumn vibes. The school year has officially begun, so I wanted to share some tips with you all today for packing a zero waste lunch. 🍎 These tips apply to your children headed off to school, but they also work for those of us who go to the office for work. As I mentioned in my September newsletter, I recently accepted a new job. At the end of September I will be going back to in-person work – so excited to leave remote work behind! Let’s jump right into some zero waste lunch tips.

Lunches packed in lunch boxes, a zero waste way to bring lunch to school

~Invest in a nice lunch box or buy one second hand.

If you plan on packing lunches for yourself and/or your kids, you will need a good lunch box. Before checking out any new options, I suggest shopping at second hand stores in your area. You might even be able to borrow from family or friends – or score a nice deal on Facebook Marketplace! Once you have exhausted used alternatives, find a lunch box that is 1) big enough to fit a full lunch and 2) made of high-quality materials that will last a long time. A lot of the “back to school” lunch boxes sold during the fall season aren’t always the best for long-lasting wear… Especially for work, think about possibly purchasing a stainless steel lunch container that will last a lifetime!

~Use reusable bags and containers!

Once you have a nice box, pack your zero waste lunch in reusables too. Instead of Ziploc bags, try out some reusable ones. Stasher bags are all the rage right now, but there are plenty of other products on the market too. I saw some great eco-friendly bags at Target recently! For larger items, use metal or glass containers. While many people use plastic Tupperware for lunches, I always try to avoid plastic touching my food. But, any reusable container will do – use whatever you already have in the house. Make sure your kids bring them home at the end of the day so that they can be washed and used again!

~Buy snacks from the bulk bins instead of individually packaged.

Grocery stores are full of individually packaged snacks… Which seem perfect for lunches. However, these are extremely wasteful in terms of plastic packaging. You often don’t get a lot in each bag, and the cost to buy individually packaged items is more expensive than buying a larger pack and separating the food yourself. A great zero waste lunch tip is to buy food from the bulk bins! Many bulk food stores have numerous snack options. Pack them in reusable bags and your lunch is ready to go!

Vegetables and fruit in reusable lunch containers

~Pack leftovers for lunch!

Don’t feel like you have to pack a new meal for lunches. A great way to prevent food waste is to bring your dinner leftovers from the night before to eat at lunch the next day! This allows you to save that food from going to waste in your fridge, and it is often much easier to pack than a bunch of snack bags. 🎉

~Try adding less meat options in your zero waste lunch.

We all know that plant-based diets are much better for the environment… So challenge yourself to pick a day (or a few days!) of the week to go meatless. One of my go-to lunches is a nice peanut butter and jelly sandwich – totally perfect for a Meatless Monday lunch! Every small change has an impact; avoiding meats in your lunch even just one day of the week helps.

~Bring lunch leftovers back home from school.

Instead of having your kids dump what they don’t eat, just ask them to reseal their reusable containers and bring them home. Then, compost that food waste! Ta-da, you just saved a bunch of waste from heading to the landfill. It is also a good idea to evaluate what your kids doesn’t eat. If there is a bit of everything left, you might be packing too much. When only a few items are left behind, they might not enjoy those foods as much. All good insights for keeping food waste at a minimum!

Pin now to read later!

Final Thoughts on How to Pack a Zero Waste Lunch

One of the easiest things you can do to reduce your impact during the school year is to just pack a lunch each day. Not only does this help you monitor what your kid is eating, it also allows you to shop in bulk, use reusables, and curb food waste in the cafeteria. The same goes for packing your own lunch for work; such a great way to stay eco-friendly during the year! 😊 Do you pack a lunch for yourself and/or your children?? Comment below your favorite lunch snacks!

Love,
Jenna ♥

➡️ Subscribe to never miss a post! ⬅️

Loading

bookmark_borderWhere Homeowners Can Improve Their Carbon Footprint

It’s becoming increasingly clear to, well, everyone that we need to change the way that we live. The recent IPCC report drove home the point that, while things can still be salvaged, we need to get moving! The good news is that most people are on board with this plan. They want to do their part for the world! And that’s brilliant because while the large corporations will have to shoulder most of the responsibility, we individuals have to do our bit too.

However, it’s important to know how to do things correctly. Otherwise, the necessary improvements just won’t be there! In this post, we’re going to look at some of the common environmental errors that homeowners make. If you’re guilty of any of them, then look into making some changes sooner rather than later.

New Products Everywhere

You’ll need to have plenty of items in your home if it’s going to be at its functional best. However, that doesn’t mean that you should just hit the shops every time you need something to have your home in full working condition, even if you’re looking for environmentally friendly new items. It often makes more sense — from a decor, price, and environmental standpoint — to buy used items. Those goods will work just as well as any others but won’t have anywhere near as big of an environmental impact.

Cleaning Chemicals

We all want our homes to be clean. Indeed, most people would think that it’d be pretty awful to live in a home that was fundamentally dirty! However, it’s important to think about how you’re cleaning your home. Some products can be extremely toxic, which is both bad for the environment and your health. Fortunately, there are eco-friendly alternatives for all the common home cleaning appliances, while companies that offer eco-friendly carpet cleaning will ensure that the big tasks don’t have a negative impact on your carbon footprint, either. As well as being better for the planet, you’ll also find that making the switch to eco-friendly products helps to boost your air quality, too.

Old Appliances

It’s generally better to keep hold of items for as long as possible, rather than just buying a replacement whenever you feel like it. However, there are some purchases where you should regularly upgrade—for instance, your home appliances. If you have an old washing machine or dishwasher, then it’ll probably be using more energy than it needs to. Modern appliances are much more energy-efficient. That means that every time you use it, its environmental impact will be less. And plus, you’ll save money, too.

A Lack of Imagination

Finally, let’s think about the imagination factor. Most people just make small tweaks to a pretty traditional home, but that can be a little limiting. There’s so much more that you can do! So rather than just trying to adapt to what you have to be more eco-friendly, think about the additional things you can do that’ll lead to having a home that’s better for the world as a whole.

Love,
Jenna ♥

➡️ Subscribe to never miss a post! ⬅️

Loading

bookmark_borderLeekalos Reusable Menstrual Pads Review – An Easy Way to Zero Waste Your Period!

Hey earth muffins! If you have been reading my blog for awhile, you will know that I have been trying out sustainable alternatives to period products. The first menstrual cup I tried out, the Lena cup, I wasn’t a huge fan of. The silicone was on the harder side which made it uncomfortable for my body. I tried out the Organicup next, which was definitely softer than the Lena cup… But I still didn’t find it super comfortable either. I decided that I would take a break from menstrual cups and try out reusable pads instead (affiliate link). After using these Leekalos pads for a bit, I thought I would share my thoughts with you all. Let’s jump right into my reusable menstrual pads review!

A picture of four reusable menstrual cups

What I Love About Leekalos Reusable Menstrual Pads

Firstly, they work really well! Similarly to a disposable pad, the reusable ones catch your blood without leaking too. I was a bit concerned about this when I bought them, as single-use pads are made with specific materials to suck up everything. Reusable pads are made of just fabric, so I wasn’t exactly sure if they could successfully do the job or not. But, they definitey can! I bought a pack of smalls and a pack of mediums. At the start of my cycle (which are heavier days), I use the mediums. After day two I am totally fine with wearing the small pads. I love that you can get different sizes depending on your flow, just like “regular” pads!

Reusable pads are SO much more comfortable. The material of disposable pads is often plastic-y and makes weird noises when you walk… Because reusable pads are made of fabric, they are super soft and move with your body. Instead of having to stick it to your underwear, the wings snap together. There are even two different snaps that you can use for the perfect fit! I love this because 1) it is less obvious that you are changing your pad in a public restroom and 2) you can move the pad into a different position easily, if necessary. A stick-on pad definitely does not have this option!

This Leekalos reusable menstrual pads review would not be complete if I didn’t mention washing the pads. The ones I purchased are made of dark fabrics which means they did not get stained. I assume if you buy lighter fabrics they might stain a little, but overall they are super easy to wash! After I changed my pad I would rinse it off and soak it in my sink. Then, I would place it into the “wet bag” that came with the pads. At the end of my period, I did an express wash load to clean all of the pads – and they look good as new. Super easy and awesome that I will be able to use these again and again.

Other Things I Like About Reusable Pads

I also love that reusable menstrual pads save you money in the long run. I bought each pack of 6 pads for around $10 and will be able to use them for a long time (affiliate link). Normal pads and tampons are pretty expensive at the store, and you have to keep buying them every month or so. Plus, these disposable options have the extra environmental cost of rotting in a landfill for hundreds of years! Seems like a no-brainer to opt for the reusable alternative instead.

Lastly, there is just something about allowing your body to free bleed on your period. While I love the idea of menstrual cups, I haven’t been able to find one that works well for my body. Inserting and removing a menstrual cup can be a challenge, so I love that I can just snap on a pad instead. For me, it is definitely better to just let it all flow out naturally (but obviously this might not be your preference).

What I Dislike About Leekalos Reusable Menstrual Pads

While this doesn’t bother me, you might not enjoy getting up close and personal with your menstrual pads. It does add a bit of time to soak/rinse after you change your pad, but it really isn’t that much of a committment. It might even take you longer to insert or remove your menstrual cup if you aren’t skilled at doing so yet!

I also think it is important to note that your pad will obviously smell after it has been used… But, I have noticed the smell to be less than with a disposable one. Don’t worry – no smells will linger once you throw your pads in the wash! To combat any excess smells in the bathroom, I suggest wrapping up your pad before placing it in to your wet bag.

Pin now to read later!

Final Thoughts!

It isn’t very difficult to zero waste your period – there are so many great alternatives out there. I absolutely love reusable menstrual pads! I am a bit bummed I didn’t start with them; but, I guess I would have never known that I am not a fan of menstrual cups if I didn’t. Reusable menstrual pads are comfortable, easy to wash, and budget friendly. I highly recommend checking these Leekalos pads out (affiliate link)! I hope you enjoyed this reusable menstrual pads review – let me know your thoughts on zero waste period products in the comments below!

Love,
Jenna ♥

➡️ Subscribe to never miss a post! ⬅️

Loading

bookmark_borderDIY “Eat Me First” Box – An Amazing Food Waste Management Tool

Hey earth muffins! Food waste is a huge issue in the modern age. While people all over the world are starving, many first world countries throw away a crazy amount of food… You might think this is a problem for other people, but I can guarantee you are guilty of it as well – we all are! Even if you care enough to read about how to reduce your food waste, you might still find youself with wasted food in the kitchen. In today’s post, I wanted to share a great food waste management tool that I have been using for quite some time now – an “Eat Me First” box. Let’s jump right into the DIY!

What is an “Eat Me First” Box?

In the simplest of terms, this box is a daily visual reminder to reduce your food waste. It doesn’t even need to be a box – it can be a bowl, a shelf in your fridge or pantry, or a bag. Many people aren’t aware of the foods in their kitchen that are almost expired/going bad. This is because they are often spread out throughout the fridge and pantry. Unfortunately, this leads to wasted food. I know I definitely have had to throw away food because I forgot it was there! Once all of this food is in one location, you can get in the habit of choosing it first. This is an amazing food waste management tool because you will reduce the amount of food that gets thrown away to the landfill. Plus, it is super easy to make!

What You Need:

-Some sort of box. Like I mentioned above, this doesn’t actually need to be a box and can be anything from a mason jar to a basket to a shelf in your fridge.

-Food that is almost going bad. Examples include bananas that are almost brown, bulk food nearing its expiration date, etc.

What to Do:

First, figure out what to use for your box. Get creative! Find something from around the house or hit up some local secondhand stores to find something that will work. I personally found a huge vintage spaghetti bowl to use for this DIY food waste management project.

If you want, decorate the box! This is helpful for anyone with kids, as some fun decorations get them excited to eat whatever is inside. It might be useful to create an “Eat Me First” sign to attach to the box as well. Use art supplies you already have in the house for decorating. I suggest avoiding things like glitter that are not sustainable (and get everywhere!).

Once the box is finished, find a place to put it. I suggest a shelf in the fridge that is accessible to all members of your family. Or you can place it on a similar shelf in the pantry. Or even both if you make two boxes!

Fill the box with food that is almost going bad. This can be anything from leftovers to fruit that is almost too ripe or rotten. Anything goes! Make it a practice to choose food from this box first before selecting something else from the kitchen. This ensures your food waste will be less, which is awesome!

If you still end up with some food waste, no worries. You have at least made some effort to reduce it! If you compost, place the food waste in the compost bin to naturally break down. Last resort, throw the food into the trash.

Pin now to read later!

Final Thoughts on this DIY

I highly recommend making an “Eat Me First” box for your kitchen, as it is an effective food waste management tool! It is easy to get into the habit of eating from the box first before eating other foods. Plus, it is much easier than composting if you have been trying to think of a way to divert your food waste from heading to the landfill. Don’t be disappointed if you still find yourself creating waste even with this box – keep up the great work and you will see small improvements over time! Do you have an “Eat Me First” box in your kitchen? Comment below your thoughts and what you think of this DIY!

Love,
Jenna ♥

➡️ Subscribe to never miss a post! ⬅️

Loading

bookmark_borderHow to Zero Waste Your School Supplies!

Hey earth muffins! I can’t believe it is already back to school season. 👩‍💻 The schools where I live started super early this year due to Mister Corona – August 23rd! While this is my second fall that I will not be heading back to school, I always get excited for the upcoming months. With the start of a new school year comes the need for classroom supplies… So, try your best to make as many sustainable choices as possible! I’ve talked about zero waste school supplies on this blog before, but I wanted to share my top tips for how to zero waste your school supplies this year. Let’s jump right into it! 🍎

A picture of zero waste school supplies

~Buy your school supplies secondhand!

Instead of heading right to Target or Walmart to stock up on school supplies, try searching through secondhand options first. The best place to start is to look at the items you already have in your house. I definitely would always end up with extra pencils, paper, and notebooks at the end of each school year. This is the perfect opportunity to use up what you already have! Many thrift stores around this time of year also have tons of school things to purchase – and you might even save yourself some money too! Along with secondhand stores, check out your local Buy Nothing page on Facebook or even Facebook Marketplace to see if anyone is getting rid of the supplies you are looking for. You can even ask family or friends in your area to see if they have something you need.

~Opt for e-textbooks instead of buying them 📚

Back in college, I made the mistake of buying a few of my textbooks. Now that I am out of school, I definitely have never looked at them again…. So I would recommend either renting your books or getting an e-book version. While renting isn’t the best choice due to shipping back and forth from the rental company, it is great that the books are able to be reused each semester. Plus, some teachers/professors are strict about having a physical copy of the book during the school year. However, if you are able, an e-textbook is a great sustainable option! Many e-books have options to virtually highlight and add notes as well, which is a great way to help you study throughout the year.

~Buy yourself a refillable pen!

Along with pencils, pens get wasted a lot during the school year. In order to truly zero waste your school supplies, you need to choose options that are better for the environment. In terms of pencils, pass on plastic mechanical ones and use traditional wood pencils instead. These create a lot less waste, and you can even buy pencils that can be composted or planted once used up! For pens, I suggest investing in one with refillable ink. Not only are these super great for the environment (just think about all the plastic you won’t have to use anymore!), they also are cool and fun to use. Amazon has a good selection of refillable ink pens starting as low as $10, so I recommend checking them out (affiliate link)!

A hand holding a refillable fountain pen

~Read online versus printing to save paper

Similarly to your textbooks, do your best to read online instead of printing. This saves paper, which is obviously better for the environment. Adobe Reader has some great annotation features for PDFs that can be used for note taking. I loved doing this in college because I was able to have everything on my laptop when I studied at a library – no need to lug around a binder full of articles! If you need to print something, make sure to print double sided and two pages to a side. This will print 4 pages of your reading on one piece of paper, which still saves at least a little paper!

~Always opt for a sustainable version of your favorite school supplies!

If you have to buy new, don’t just purchase the cheapest thing at Walmart. While this is tempting, these are not always the best eco-friendly options. (Yes, even if it is marked “sustainable” or “recycled paper” – I see you greenwashing companies!) Instead, I suggest doing some research and finding smaller brands that have exactly what you need. From zero waste planners to highlighter pencils, there are a bunch of awesome eco-friendly school supplies out there! Buying from these companies supports small business and ensures that you are buying the most planet-friendly option.

Pin now to read later!

Final Thoughts on Zero Waste School Supplies

Overall, it is totally possible to have zero waste school supplies! ✏️ While the back to school shopping list can be overwhelming at times, it is totally manageable if you reduce the new items you have to purchase. I suggest using what you have first, then looking at all secondhand options before buying new. Then, do your research to pick a great sustainable alternative to the product you were looking to buy! I hope everyone is having a great back to school season so far – I am so excited for autumn and the upcoming months ahead! What was your favorite back to school purchase this year? Comment below and let me know what sustainable brands you love!

Love,
Jenna ♥

➡️ Subscribe to never miss a post! ⬅️

Loading