bookmark_borderHow to NOT Recycle: Things to Avoid Doing

Hey earth muffins! When I talk to people about sustainability, the topic of recycling is usually one of the first things to come up. “Oh, I do my part because I recycle”, “I think recycling is enough”…. I hate to break this to you all, but recycling shouldn’t be what you start with when beginning an eco journey. While there are positives to recycling, there are also a whole bunch of negatives (but that is a whole post for another time). Along with that, many people don’t actually recycle correctly; this means some things you think you are recycling might actually end up in the landfill. To help improve your recycling habits, I thought I would share a few tips on how to NOT recycle. ♻️

1. DON’T recycle everything and make sure you know your local recycling center’s rules!
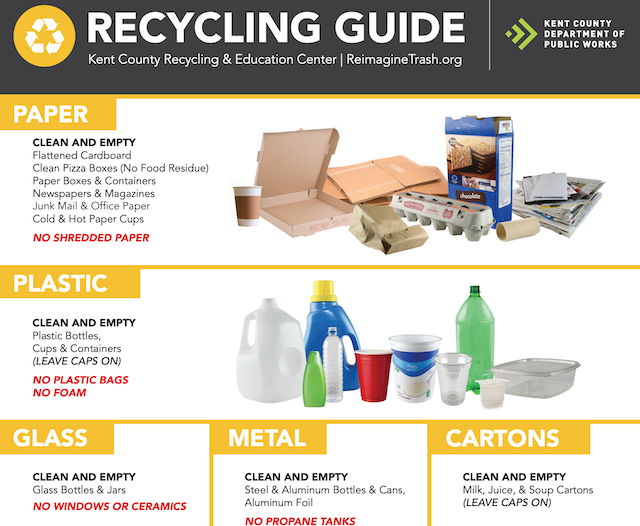
A picture of the Kent County recycling guide

Some cities have amazing recycling plants in place, others have none. The rules of what can (and cannot) be recycled will be different depending on where you live. Usually a quick google search of “YOUR CITY recycling rules” will do the trick. Many places have easy to read guides and PDFs with plenty of visuals to help aid you in your recycling. Take time to read through it and understand what types of materials can be recycled in your city. This is extremely important when recycling plastic. If you are new to identifying what plastic type an object is, I suggest reading this recycling guide.

2. DON’T forget to wash out your containers! 😬

If you leave chunks of food in the metal can or plastic jar that you are trying to recycle, it will not be able to be recycled… And it could contaminate the whole batch of recycling as well! Best practice is to dump that extra food in your compost bin, rinse it out with water, let dry, and THEN place in the recycle bin.

3. DON’T bag your recyclables – keep things loose out there!

While trash is put into bags when taken to the landfill, it is important to keep recyclable items loose. Putting your recycling into bags makes it difficult to sort at the center; definitely how to not recycle for sure! Many recycling centers don’t even accept loose plastic bags because they have the tendency to get stuck in sorting machines. If you live in an apartment (like me) and have to bring your recycling down to a shared drop off container, I suggest finding a container that you can easily carry down to dump. I use a plastic secondhand crate that a friend gave me a long time ago – it works great! 🌎❀️ Having everything loose allows your center to do its job efficiently and effectively, which is all we can hope for when recycling!

4. DON’T recycle tiny pieces of aluminum foil.
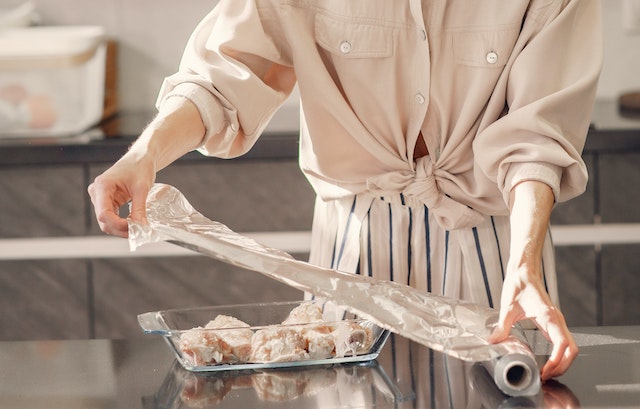
A woman using aluminum foil before recycling it

The reason for no plastic bags is similar to throwing small amounts of aluminum foil into the recycle bin… It might not get caught in the machines, but it most likely will not get sorted correctly. If your center allows you to recycle aluminum foil, save your pieces and turn them into a ball. Once the ball is a large size, it can easily be recycled. 😍 Note that it is extremely important to make sure the foil is free of food/liquids when doing this as well!

5. DON’T get lazy with your recycling habits.

If you don’t know if an item can be recycled, don’t put it in the bin. Don’t put it in the bin even if you wishfully think it might be able to be recycled. If you don’t do the research on if it can be recycled, don’t put it in the bin!! Sure, recycling might take a few more minutes than just throwing it in the trash… But, recycling centers can only be as good as the people inputting the materials to be recycled. It is your responsibility to take ownership of the recycling bin in your house! 😊 If Google can’t help you figure out something you want to know, try calling your local recycling center – they will have the answer you need!

6. DON’T assume everyone else is recycling – do your part!

“One person can’t make a difference”. “My family recycles so I don’t need to”. I’ve heard so many excuses for not recycling. Even if 98% of your network is already recycling, you can still increase that percentage! There is no reason why you shouldn’t take the time to help the planet. Again, recycling has its flaws; but, it is still a great way to do your part! 😊
How to not recycle pinterest pin
Pin now to read later!

Love,
Jenna β™₯

➑️ Subscribe toΒ never miss a post! ⬅️

Loading

bookmark_borderWays to Celebrate an Eco Friendly Thanksgiving!

Hey earth muffins! 2020 had its ups and downs, but I hope that you all are still thankful for something… Whether it be a family in good health or lockdown increasing your free time. 😊 Thanksgiving has always been one of my favorite holidays; you basically just eat food all day! While many Thanksgiving celebrations will look a little different this year, I hope everyone still feasts in some way. To ensure your holiday is “green”, here are my recommendations for an eco-friendly Thanksgiving!

A picture of an autumn forest with the words give thanks

Tips for a Zero Waste Turkey Dinner

I think the trend for this year (with Mister Corona) is smaller gatherings for Thanksgiving dinner. While this isn’t necessarily a bad thing, it could lead to some excess food waste if the recipes aren’t modified for the new guest list. Food waste is a huge problem worldwide, so I suggest reading some of my tips to reduce food waste as much as possible! 😍

Some grocery stores are still struggling to stock everything, which might mean you weren’t able to get all of your usual ingredients. Don’t be afraid to stray from tradition – try something new this year! Especially if less people are there to judge the food, you might as well see if a new dish could be added to the turkey feast.

On a similar note, try to add more eco-friendly ingredients to your meal. Shop local at the farmer’s market or deli, use more plant-based foods, and try to avoid plastic packaging as much as possible. Holidays centered around food lead to a lot of waste in general, so do your part to avoid that as much as possible!

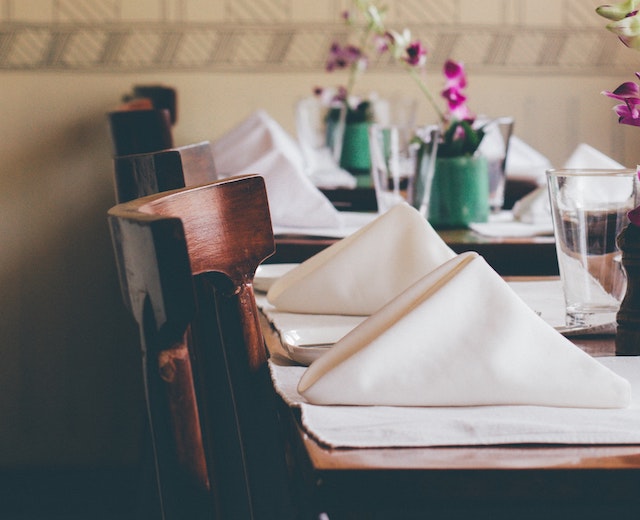
Set your table with reusables! I have been designated as the napkin folder in my family. My mom has nice cloth napkins for every holiday, and I find a creative way to fold them. While the Christmas tree fold is my personal favorite, there are a bunch of different ways to fold them for Thanksgiving! Having a fancy table set with a tablecloth, napkins, and nice dishes really makes your dinner feel like a feast. Plus, it saves on waste!

A picture of a thanksgiving table set with cloth napkins

Try Skyping in family members that are usually there. 😊 I mentioned in my ways to celebrate Halloween post that a virtual party is a great way to adapt to this year. I actually know people who do this yearly on Thanksgiving due to family in different countries, so why not give it a try? This will definitely make the holiday feel more “normal” as well. A great eco friendly way to celebrate Thanksgiving! πŸ¦ƒ

Other Eco Friendly Thanksgiving Ideas!

Thanksgiving in my family has always been more than just dinner. It is a day to be with your loved ones and reflect on the “goods” of the past year. Take some time and write down all of the things you are grateful for. 2020 had a lot of bad in it, but I bet you will still be able to come up with a list of the goods. My family likes to write down the five biggest things we are thankful for and then share them at dinner; it is such a great way to reflect together and see what each family member is thankful for!

A picture of a letterboard with the words Grateful on it

Watch the Macy’s Thanksgiving Day Parade! My family watches it every single year, and I’m happy it wasn’t totally cancelled this year. While it will be different, I bet they will try to make it as “normal” as possible. I personally love to watch the snippets from Broadway shows at the very beginning; but, it is also fun to see all of the people celebrating in New York! 😊 Santa’s float is always the last one. It marks the start of the holiday season, but I may have already started listening to Christmas music… 🀫

If you are able to, watch A Charlie Brown Thanksgiving. My family watches the Peanuts on many of the major holidays. I know that for Halloween at least they stopped putting it on TV this year, but I suggest trying to find it another way! The movies are really short and bring back a lot of nostalgia. Plus, I don’t think there are many other films centered around Thanksgiving. πŸ˜‚

Regardless of who you are celebrating with this Thanksgiving, I hope you find ways to make your holiday “green”. And, take some time to truly reflect on what you are thankful for. It will make you feel great, I promise! I am thankful that I have such amazing readers here on Life of an Earth Muffin! 🌎❀️ I wish everyone a safe and happy Thanksgiving Day this week!

How to have an eco friendly thanksgiving pinterest pin
Pin now to read later!

Love,
Jenna β™₯

➑️ Subscribe toΒ never miss a post! ⬅️

Loading

bookmark_borderHow to Reduce Your Food Waste

Hey earth muffins! A few weeks ago I got an email from the Commission for Environmental Cooperation (CEC) regarding a Food Matters Action Kit that they launched in September. This kit contains activities for kids and youth centered around spreading awareness of food waste. Such a great idea! 😍 As many holidays are coming up (especially Thanksgiving next week!), I thought I would share their tips on how to reduce food waste in your home. While these tips are important to think about always, they are especially important to think about with holidays centered around food.

Why is Food Waste so Important?

For starters, ONE THIRD of the food produced in the world is wasted. 😦 This statistic absolutely blew my mind – that’s so much food that could be utilized. This wasted food produces about 193 million tons of greenhouse gases; that’s the same amount as driving 41 million cars continuously throughout the year! So, it’s clear that wasted food is definitely a problem… What can you do to reduce it?

1. Plan out your meals

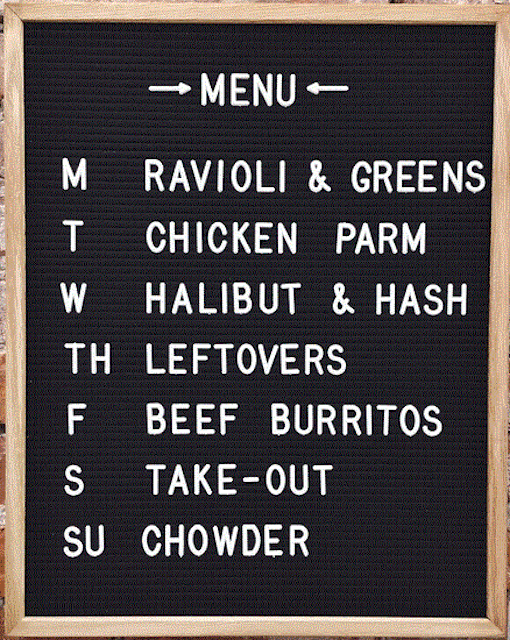
Instead of hitting up the grocery store and buying what looks good, plan out your meals for the week! I personally do this every single Sunday. 😊 My boyfriend and I have a cute menu letterboard in our kitchen, which also helps us keep to our planned out meals. If you don’t want to plan out all three meals each day, just try doing dinner. For lunches I usually just eat leftovers from the night before anyway, so that works out really well!

A picture of a letter board menu

2. Shop your kitchen BEFORE the store

After you plan out your meals for the week, look through your fridge/freezer/pantry before going to the store. You might be surprised at what you already have in the cupboards! If you notice that there are things in the pantry or fridge close to their expiration date, try incorporating them into some of the meals this week.

3. Throw as little food waste in the trash as possible!

When food gets trashed, it ends up in the landfill. Instead of breaking down and producing carbon dioxide, it will create methane. Methane is 25% more potent than CO2, so it is best to avoid it as much as possible!

4. Compost instead

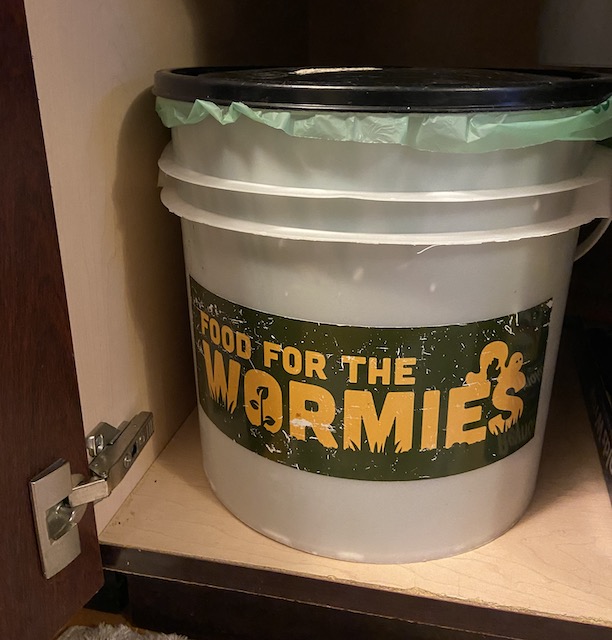
Composting your food is a great alternative to throwing it in the trash. Even if you live in an apartment, there are still ways that you can compost. I personally pay for a composting service to pick up my compost twice a month; I honestly can’t believe how full the bucket gets sometimes. It definitely makes me realize that food waste is a problem that many don’t even think about.

A picture of a compost bin under the kitchen sink

5. Keep organized

Make sure your fridge/freezer/pantry is organized and accessible. This helps you know what you already have in the kitchen. I’m sure you’ve seen someone’s fridge that is a complete disaster, so don’t be like that! πŸ˜… Keeping organized also helps with meal planning and making lists for the grocery store.

6. Share food

If you end up having extra food, share it with others (be safe with Mister Corona though)! Take some to work, share on sustainable apps like Olio, drop off at a friend’s house, etc. Again, make sure that you are throwing away as little food as possible!

7. Use your freezer!

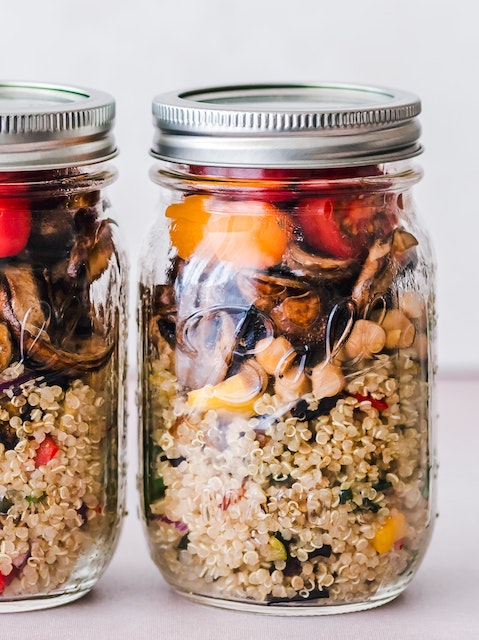
This is one of my favorite ways to reduce food waste. If my boyfriend and I cook something that results in a few extra servings, I will freeze them in mason jars. When I need a quick WFH lunch, I’ll pull something out. I also like to utilize my freezer for saving fruits that are about to go bad. They are perfect for smoothies! Pro tip: when freezing cut fruits/vegetables, freeze them on a baking tray first. This makes them freeze individually so when you put them into a jar you can still pull out the exact portion you want. 😍

A picture of mason jars filled with leftovers for the freezer

8. Learn creative cooking

When looking at the food already in your kitchen, you might be confused on what you can make with certain ingredients. Now is the time to learn how to cook with unique items! Scour Pinterest for new recipe ideas or put the ingredients into Supercook to get personalized recipes. Get out your creativity!

9. Rescue food

Don’t let perfectly good food go to waste! If you see marked down food at the grocery store because the expiration date is coming up, pick that first. Buy single bananas and stick them in the freezer. If you see food nearby on Olio, take it (if you need it of course!). Shop at food “thrift” stores if you have them nearby; I personally love my Aunt Millie’s bakery thrift store. πŸ˜€ There are so many great ways to rescue food!!

10. Spread the word

If you are interested in sharing fun and informative food waste activites, I highly suggest checking out the CEC’s Food Matters Action Kit. It has so many great facts inside! Regardless if you use the kit or not, it is important to spread awareness on food waste this holiday season. I hope you put some of these tips into practice next week and share them with your friends and family. 🌎❀️

How to reduce food waste pinterest pin
Pin now to read later!

Love,
Jenna β™₯

➑️ Subscribe toΒ never miss a post! ⬅️

Loading

bookmark_borderYay for Earth Review: Sensitive Skin Face Lotion

Hey earth muffins! In my recent wishlist post, I mentioned the Yay for Earth lotion that I have been eyeing for quite some time now. After posting that, I realized that I should just treat myself – so I placed an order! 😍 I have been using this face lotion twice a day for a few weeks nows; it is the perfect time to share my thoughts on the product. Without further ado, here is my Yay for Earth review!

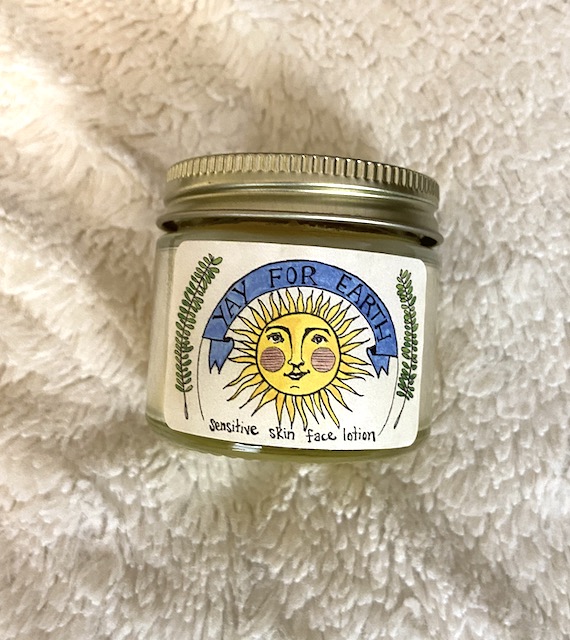
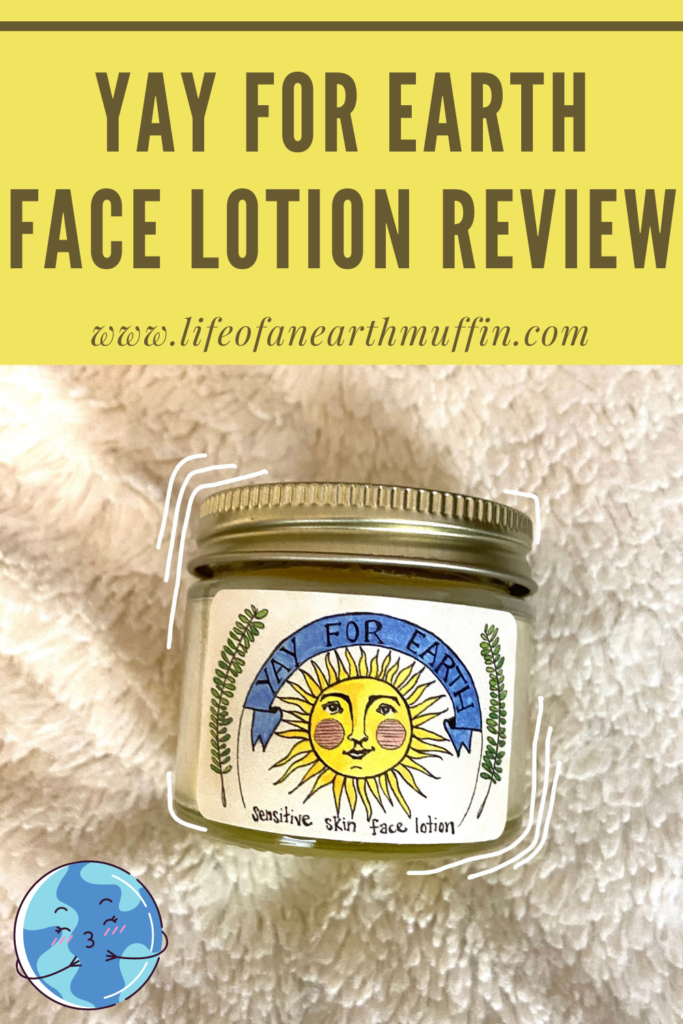
A picture of the 2 oz glass jar of Yay for Earth sensitive skin face lotion

What I Love About Yay for Earth

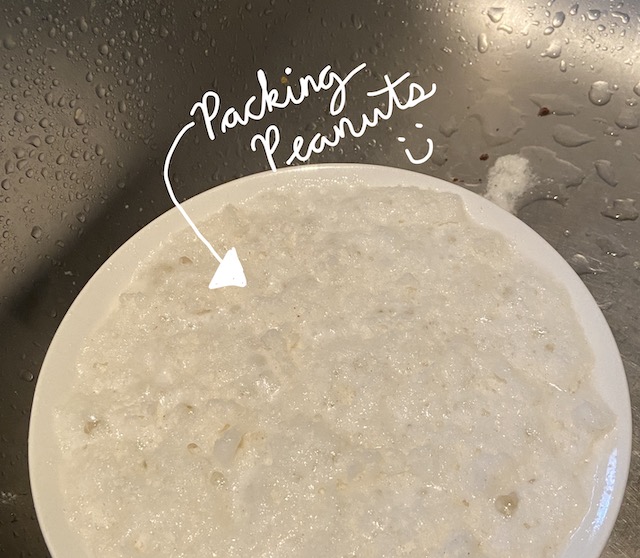
First, this company is uber sustainable! I’ve been a long-time follower of the owner (Stevie) on Instagram, and she definitely makes sure the company does everything it should. The lotions are packaged in glass (or a metal travel tin), which is awesome! Not only that, but the rest of the packaging is also eco-friendly. The box is cardboard, the tape they use is paper, and the packing peanuts are water soluble. I found so much joy spraying the peanuts in my sink until they dissolved. πŸ˜…

A picture of water soluble packing peanuts mostly dissolved in a kitchen sink

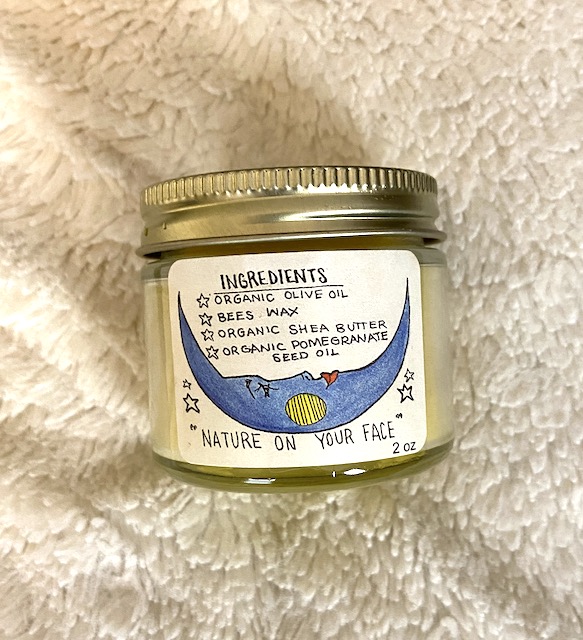
I also love that the lotion is made of only 4 natural ingredients – that’s right, four!! Instead of finding names of things you can’t pronounce on the label, this lotion has organic olive oil, organic shea butter, local beeswax, and organic pomegranate seed oil.

More Things to Love…

The fact that the lotion is made of simple ingredients is awesome, but it is also very effective too! I apply this lotion after washing my face each morning and then after I get out of the shower each night. My skin isn’t usually that dry, but the colder weather (and the hard water in my apartment) does make it get drier. This lotion is AMAZING! My skin feels so moisturized and healthy after I apply it; when I wake up in the morning it feels so soft too.

A picture of the back of the glass jar of Yay for Earth sensitive skin face lotion

I’ve also noticed that this lotion helps with my acne and sensitive skin. The Yay for Earth website shows some great before and after pictures of those with troubled skin; but, I didn’t want to expect too much even though I’ve been dealing with a lot more acne this past year. Like I mentioned in a recent post, the Mario Badescu face cleanser (affiliate link) literally saved my skin… But I still get some hormonal breakouts at certain points in my cycle. I have already seen a difference in my skin since using this lotion! My breakouts are less often, smaller, and the redness from old acne scars is slowly fading away. I’m super excited to see how this product continues to help my skin!

I also love that this lotion has a subtle smell. To me, it has a faint hint of honey, which probably comes from the local beeswax. I am not a fan of strongly scented products, as many “fragrances” are just chemically based. I love that this lotion barely has any smell, as it stays true to its sustainable background.

What I Dislike about Yay for Earth

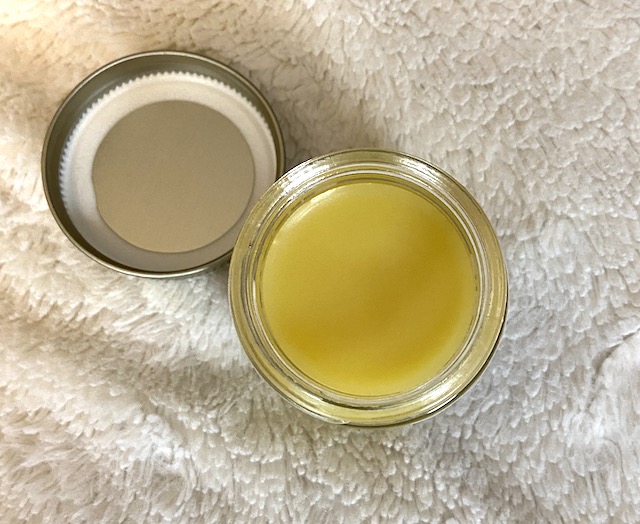
A picture of the color of Yay for Earth sensitive skin face lotion

After using this product for a few weeks, there is nothing that I dislike about it. 😬 The only thing I can really think of is that it isn’t a typical lotion consistency – which was expected. This doesn’t bother me at all, but it could bother some people. The product feels oily (as it is oiled based), and you need only a tiny bit. If you are accustomed to other moisturizers this might take some getting used to.

Lastly, I was going to quickly talk about price. I purchased the 2 oz jar for $28, but there are three other sizes to choose from as well. Because you only need a small amount each application, this product will last me a long time – so I definitely think it is worth the price! There are many other brands that sell similar products for less than this, but also many who sell for more. So, use your dollars wisely and vote for sustainability! 😊 I’d 100% recommend the Yay for Earth lotion!

Yay for Earth face lotion review pinterest post
Pin now to read later!

Love,
Jenna β™₯

➑️ Subscribe toΒ never miss a post! ⬅️

Loading

bookmark_borderHow To Insert & Remove a Menstrual Cup

Hey earth muffins! If you are looking to zero waste your period, a menstrual cup is a great option! Last year I was looking into the pros and cons of menstrual cups and wrote a whole post on that. One of my major cons was that I wasn’t sure if it would be easy to insert and remove… Now that I have been using the Lena cup (affiliate link) for a few months, I thought I would share my tried and true tips for inserting and removing cups. I hope these recommendations help any of you if you are deciding to switch too! 😊

How to Insert Your Menstrual Cup

Before you even think about putting it in your body, please sanitize it! 😬 I find that letting it float around in boiling water for a few minutes does the trick. Don’t worry about melting it; most cups are made from medical grade silicone! This is awesome because you can keep them clean AND they will last for many years.

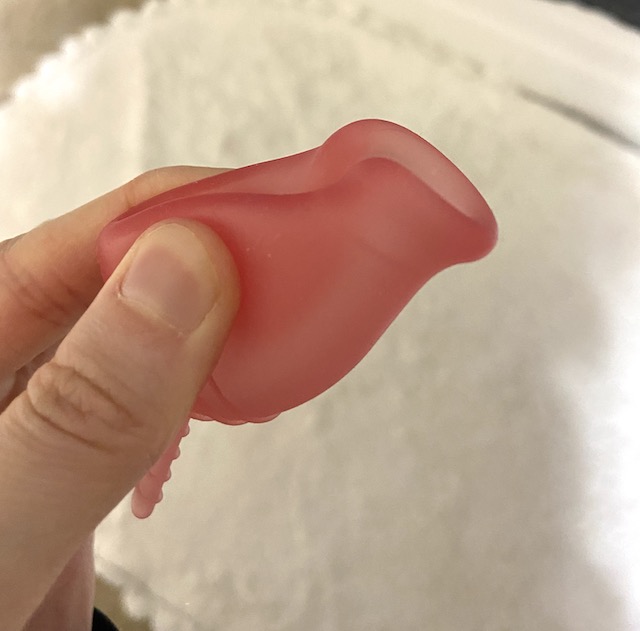
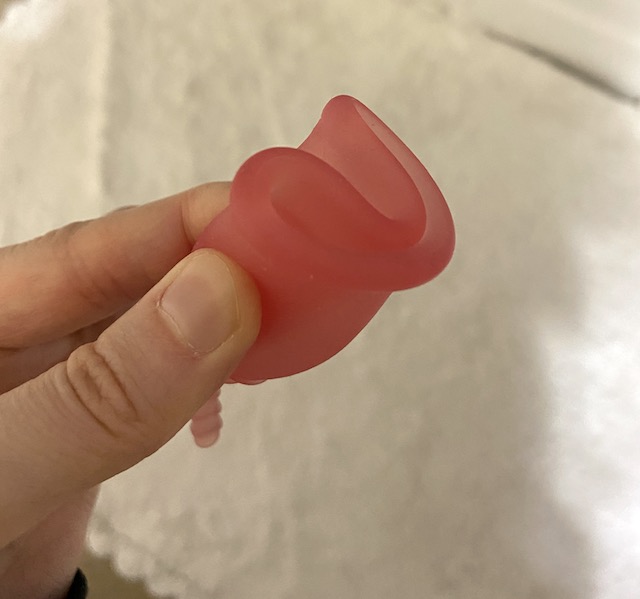
After it is sanitized, it is time to insert. πŸŽ‰ When I researched menstrual cups, I found it strange that this step was not explained in detail. “Fold and insert” didn’t really help me when I was trying this for the first time! I was a pads girl and barely ever used tampons; so, the idea of shoving this cup down there was definitely nerve-racking. My top tip – find the fold that works best for you! Because I never really used tampons, I started with the “punch down” fold. This fold results in the smallest area for insertion:

A picture of a pink menstrual cup in the push down fold

But, after trying this out, it definitely didn’t work that well for me. The cup must create a seal when inserted; this fold wasn’t allowing the cup to fully open for me. Don’t be afraid to try many folds!! I personally like the “C” fold, but there are SO many options to try out. You could even get creative and make up your own. πŸ˜†

A picture of a pink menstrual cup in the C fold

Other Insertion Tips

Even with a perfect fold, you might still have trouble inserting the cup. If you need a bit of lubrication, I suggest running water over the cup before you put it in. It is actually a great idea to insert your cup in the shower, as you will be nice and “wet” and relaxed.

It is definitely a smart idea to know your own body before putting the cup in too. If you aren’t sure where your cervix is or what angle is the best for insertion, use your fingers to figure it out! Insertion is SO much easier if you know the correct angle and how far up you need to push the cup. Every cervix is different, which means cup placement differs for each person. Some people don’t need to insert them very high, while others need to put them a bit higher. If you inserted the cup and it feels uncomfortable or hurts, then you didn’t put it in the right place. Take it out and try again! πŸ™ƒ I have found that after I insert the cup, it helps to use my Kegel muscles to “pull” the cup up into the correct space.

How to Remove a Menstrual Cup

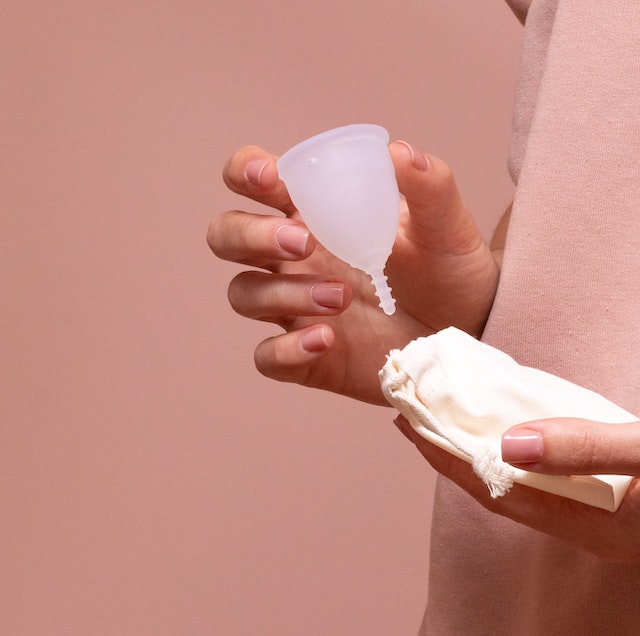
Once the cup is in, you can forget about it for up to 12 hours! I find it amazing that for $25 you can get a menstrual cup to use for years instead of having to throw away pads/tampons every few hours (affiliate link). 😍 So awesome for the planet and your wallet! After getting my cup in for the first time, I was definitely super nervous about getting it out…. But it actually isn’t hard at all…

A picture of a woman holding a pink menstrual cup

First, don’t be alarmed if the cup shifted or moved higher throughout the day. Wash your hands and then insert a finger until you can feel the stem of the cup. Do NOT pull on the stem – the cup is basically suctioned inside of you, so that will be painful. Instead, grab the base of the cup, squeeze gently to release the seal, and then pull the cup out. Remember that it will have blood in it, so I suggest removing it in the shower until you master getting it out without spilling anything. πŸ˜†

If you are having trouble locating the cup, don’t panic! There is nowhere the cup can go, it might just be higher than you expect. I have found that you can push down with your Kegel muscles and this can literally push out the cup… Try pushing and then see if that makes it easier to locate!

Overall, the first time I used a menstrual cup I thought that it would be easy to insert and hard to remove. But, I found the opposite. For me, it took a lot of tries to insert for the first time. Don’t get frustrated – it is a new experience and takes time to learn! It feels so exciting when you finally get it in! πŸ™‚ I am still learning the ins and outs of menstrual cups, but the Lena cup has been a great purchase (affiliate link)! I’d highly recommend it and (if anyone is interested) would love to write a full review on it at some point. Do your part and switch to a cup!

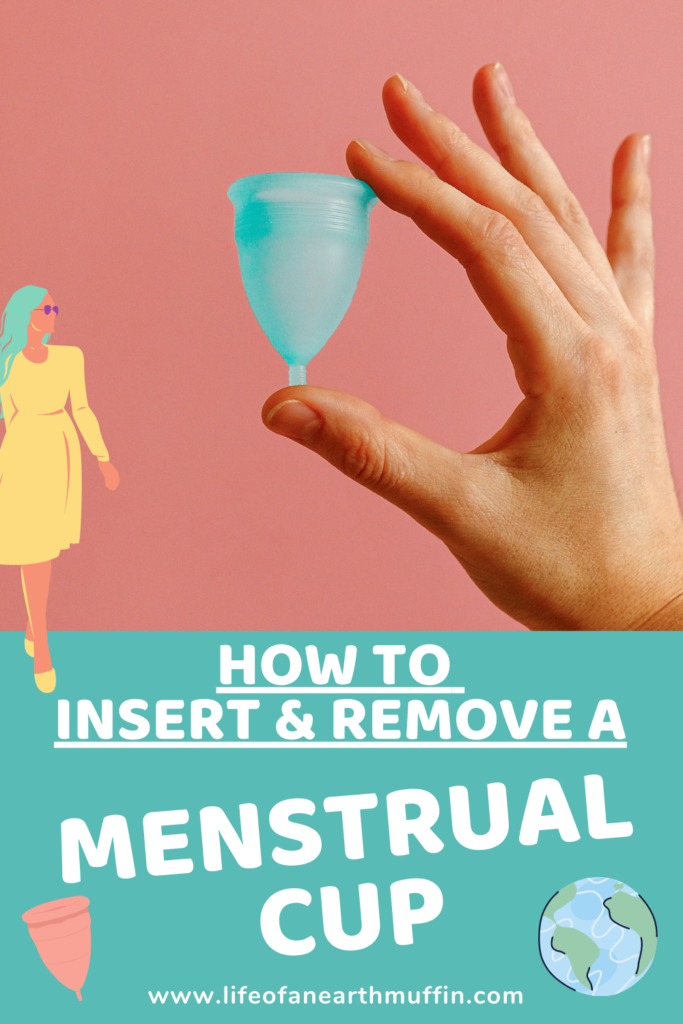
How to insert and remove a menstrual cup pinterest pin

Love,
Jenna β™₯

➑️ Subscribe toΒ never miss a post! ⬅️

Loading

bookmark_borderWhat to do with Leftover Halloween Candy!

Hey earth muffins! I am getting pretty excited now that Halloween is just around the corner! There are plenty of (safe and sustainable) ways to celebrate this year, what are your plans? Even though I recently shared tips for creating an eco-friendly costume, I don’t have any Halloween committments… Maybe I’ll relax with my boyfriend and watch some movies! πŸŽƒ For today’s post I wanted to talk about an important topic: leftover Halloween candy.

Even if you use sustainable alternatives to traditional candy for the trick-or-treaters, you might still end up with excess candy in your house. If you bought that variety pack, we all have that one candy bar we don’t like… I recently bought my one bag of candy corn for the season and ate about 3/4 of it before I got sick of them. So, what can we do to prevent this candy from going to waste? It is safe to say that you should never throw away candy that you don’t want; this food waste can easily be solved with my suggestions below! 😍

What to do With Loose Candy

For things like my candy corn, I suggest incorporating them into your baked goods! The fall season is when I find myself baking the most, as I love the flavors of pumpkin, cinnamon, and apple. There are definitely opportunities in these recipes to add some leftover candy inside! I recently made a batch of pumpkin chocolate swirl brownies; it would have been perfect to sprinkle some chopped up chocolate pieces or candy corn on top! If you don’t want to add the candy as a topping or incorporate into the batter, I suggest searching “leftover -insert candy’s name here-” on Pinterest.

A picture of three Halloween cupcakes, made with leftover Halloween candy

On a similar note, use the candy in recipes for family, friends, or coworkers! I know many people are back to work, so surprise your office with a batch of cookies, brownies, etc. Make sure you are following the correct Mister Corona protocol though, as every workplace is dealing with the pandemic differently! While large gatherings are still frowned upon, I’ve seen many people hang out with friends in their Covid-free bubble. This is the perfect opportunity to bring along some snacks or dessert as well!

What to do With Leftover Packaged Candy

Because packaged candy hasn’t been germed up yet, there are a few more options compared to leftover loose candy. First, you can obviously use the packaged candy in baking as well. There are a bunch of candy bar desserts at many restaurants, so try making that Kit Kat Blizzard or Heath milkshake! 😊

Ask your family and friends what their favorite candy is. I bet your least favorite might be one they actually love! It seems like I often forget that just because I don’t like something I assume others don’t like it as well… But, we all have unique tastes. I remember in my trick-or-treating days I would trade candy with my family members so that everyone was happy with what they got!

Another great option is to donate your excess candy to Operation Gratitude! This program has been running since 2007 and allows you to gift your candy to military members or first responders. While you probably won’t be able to fill a whole care package yourself, I bet you could with the leftover candy from family and friends as well! The registration deadline to sign up for donating is 10/31, so make sure you decide early if this is what you want to do. ❀️ If you want your candy to stay local, I suggest looking up candy drives from nonprofits/churches in your area.

A picture of the Operation Gratitude logo, a program to give extra candy to those in the military

On a similar note, use extra candy to fill a care package for someone who is far away. Mister Corona has truly kept families apart this year, so an extra special gift in the mail is always a pleasant surprise. My mom sent my boyfriend and I a care package this week, and it definitely made our day! πŸ’

You can also freeze the candy for later! I had never thought to do this until I was visiting my grandparent’s house a few years back. My grandpa was looking for something sweet and got a full jar of candy from his freezer! The expiration date for candy is many years because of how processed it is; so, keeping it in the freezer is a great way to save all of the excess from Halloween for a time when candy isn’t as common in the house. This is my personal favorite when avoiding the food waste of excess candy!

Lastly, if you must get rid of the candy try composting it instead of throwing it in the trash! Make sure you know what type of composting you are using, as some bins might not break down candy. I personally use a composting service, which would take the candy if needed (but come on, I’m definitely freezing it for later haha). What will you be doing with your leftover Halloween candy this year??

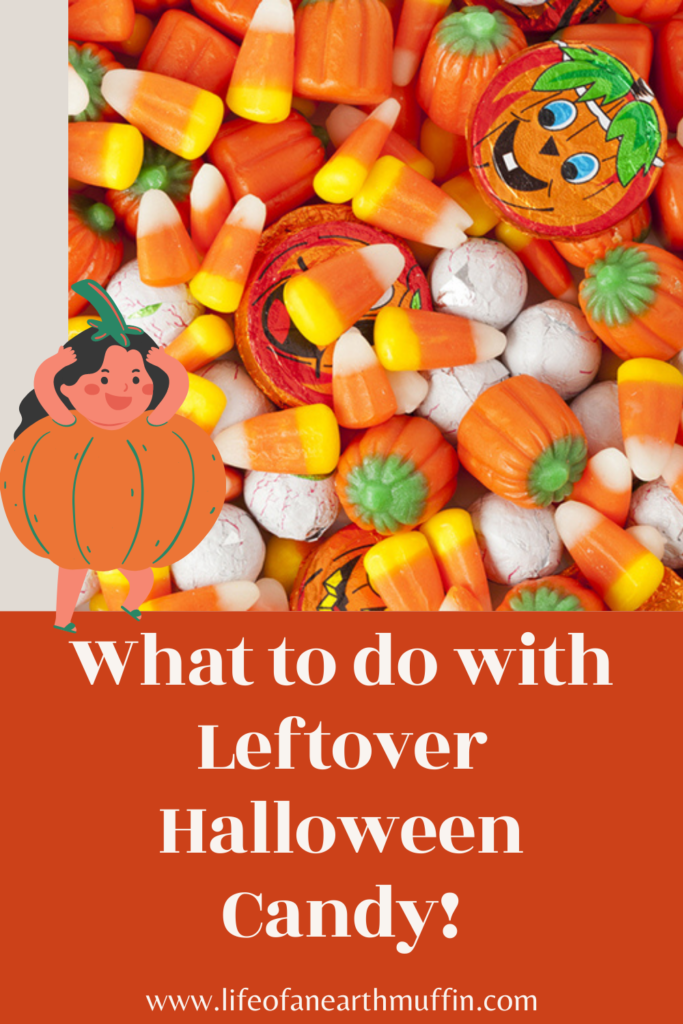
What to do with leftover halloween candy pinterest pin

Love,
Jenna β™₯

➑️ Subscribe toΒ never miss a post! ⬅️

Loading

bookmark_borderMy Favorite (Amazon) Bamboo Products!

Hey earth muffins! A few posts ago I shared what was on my current sustainable product wishlist. Now that I’ve moved into an apartment with my boyfriend, I tend to find myself on Pinterest scrolling through home decor….. 😬 Our apartment is full of secondhand finds with lots of different woods and metals; we definitely have some bamboo too! Bamboo is a great sustainable wood, so I love finding items made from it. Today I thought I would share some of my recent Amazon bamboo finds; while I might not be buying them right now, I’m definitely thinking about it! 🎍

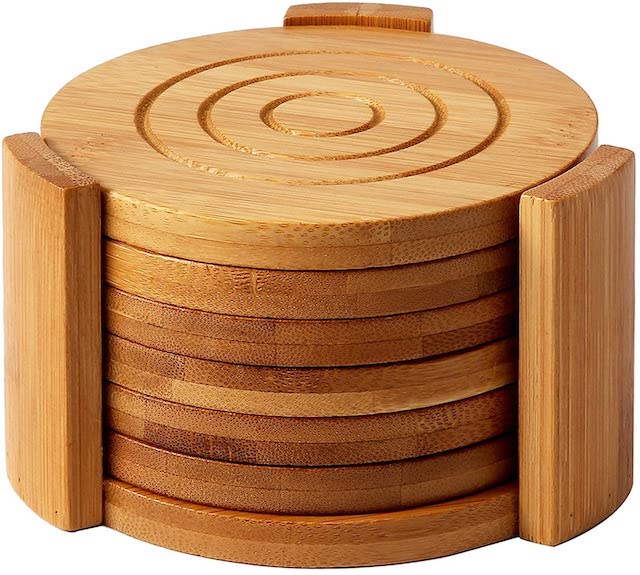
Bamboo Coasters, $12

A picture of a set of bamboo coasters

Just as a disclaimer, all of the Amazon links in this post are affiliate links. I’m trying to get the number of qualifying purchases to meet the requirements for the program, so I’d definitely appreciate using my links if you can! 😊 These bamboo coasters look awesome! A few years back my mom got me a set of wood coasters from TJ Maxx. I absolutely love them! The set was only 4 coasters though, so once we get a bigger space some new coasters would be great.

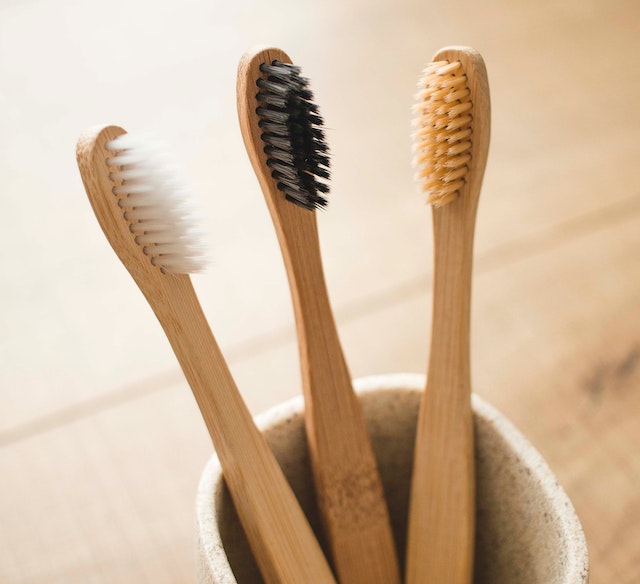
Bamboo Toothbrushes, $10 for 10 pack

A picture of three bamboo toothbrushes in a cup

Getting a bamboo toothbrush is a simple bathroom switch (almost as easy as getting a safety razor!). I use an electric toothbrush that I have had for over a decade, but I’m on my last “free” toothbrush from my dentist for when I travel. When I travel post-Covid I’ll need some sort of bamboo brush instead of buying a nasty plastic one. This pack has 10 brushes for only $10, so it is a great deal!

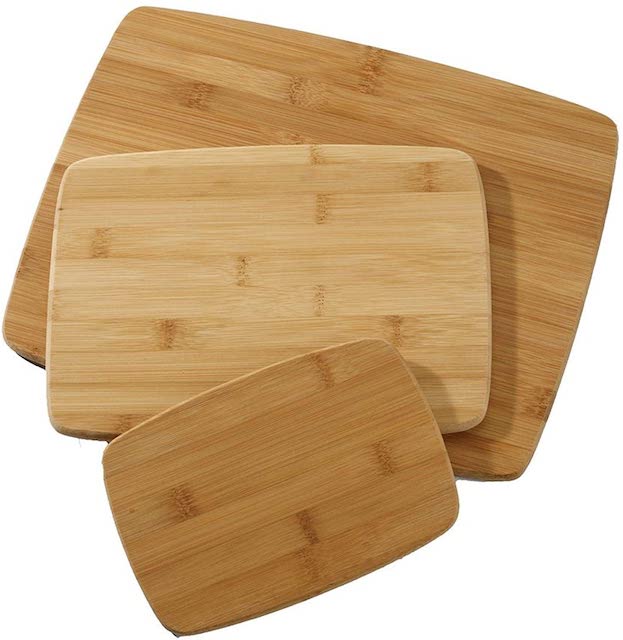
Cutting Board Set, $15 for 3 boards

A picture of a set of bamboo cutting boards

When I started my eco journey in 2018, I bought some bamboo cutting boards right away. I love how they smell like fresh wood! 😍 I also had a couple of glass ones, which is another great sustainable alternative to plastic cutting boards. My bamboo boards are on the smaller size, so I will definitely want to buy a larger set at some point. I love to cook and bake, so having plenty of cutting boards on hand is a must for me! If any of you are interested in some tips for taking care of bamboo cutting boards, let me know and I can write an Instagram post!

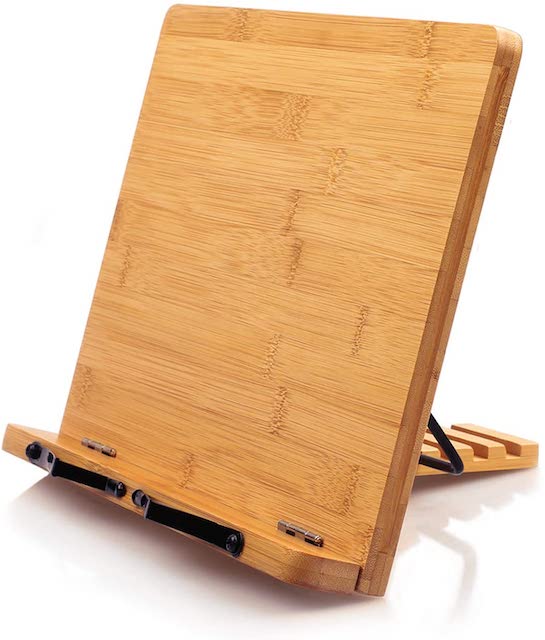
iPad Stand, $15

A picture of a bamboo iPad stand

I have ALWAYS wanted a cute stand for an iPad/cookbook in the kitchen! My boyfriend has an old iPad that I can finally use for my recipes; it is a gamechanger from trying to read off my phone’s screen. πŸ˜‚ I love that this stand can be adjusted, as many I’ve seen in stores that aren’t. This has definitely been added to my wishlist for our next apartment, as we have limited counter space currently.

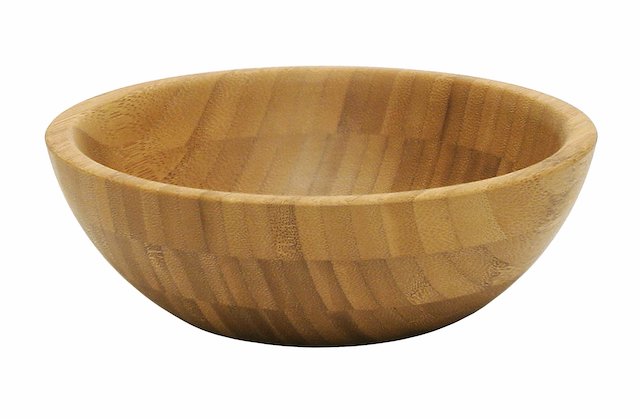
Bamboo Bowls, $30 for a set of 4

A picture of a bamboo bowl

I actually see bamboo/wooden bowls at my local thrift stores quite often, but they aren’t usually in the best shape. I love the look of them and can just imagine how tasty a salad would look inside! Before I buy a set new, I am going to keep seeing if I can find a decent enough set at a thrift store… But I eventually need to get some one way or another! πŸ™‚

I don’t know why, but I just love the look of natural woods in my home! Maybe it’s because our apartment has its original wood floors, which adds to this vibe…. Whatever the reason, bamboo products are often quite sustainable (beware of greenwashing though!), so I suggest checking some out! 😁

My Favorite Bamboo products pinterest pin
Pin now to read later!

Love,
Jenna β™₯

➑️ Subscribe toΒ never miss a post! ⬅️

Loading

bookmark_borderComposting in an Apartment 101

Hey earth muffins! Today I wanted to talk about something that I recently got into: composting in an apartment! 😊 When I started this eco-journey back in 2018, I knew that I definitely wanted to compost when I got my own place. In the United States, the average person throws away 219 pounds of food waste each year – that’s 40 million tons of food total! Why is this bad? Food can’t actually break down correctly when it goes to a landfill. Instead of turning into carbon dioxide, it releases methane due to the lack of oxygen; this is absolutely terrible for the environment! What can you do about this? Try to compost! Even if you don’t live in a house with a backyard space for a compost bin, don’t give up hope yet! Here are my top tips for composting in an apartment. 🌎❀️

How I Compost in my Apartment

First off, I would like to point out that I am definitely not a composting expert. This is all fairly new to me as well, but I figured that this shows that composting is actually easy to get into! So, I hope it can still inspire you all. 😍 If you are look for articles about all the different types of composting, I suggest this guide or checking out this website that is totally devoted to it.

If you are wanting to get into composting, I suggest checking to see if there are any pick-up or drop-off services in your city. This is what I ultimately chose, as I live in an apartment downtown with no outdoor space. These services can vary: some will give you a bin to put out with the trash and recycling, a bucket (like mine!) and collect the bucket on a specific day, or you collect your own compost and bring it to a designated spot to drop off.

A picture of a compost bin in an apartment
My compost bin stored under the kitchen sink!

Even though you will pay a small fee each month for this service, I think it is worth it. You get to support local groups that care about the environment! The organization that I support turns all the compost collected into soil. This soil is then returned back to you each month or donated to local community gardens. As I don’t have an outdoor space, I obviously donate my soil; it feels great knowing that my food waste is helping community spaces in my own city! 😊

Other Ways of Composting in an Apartment

Vermicompost

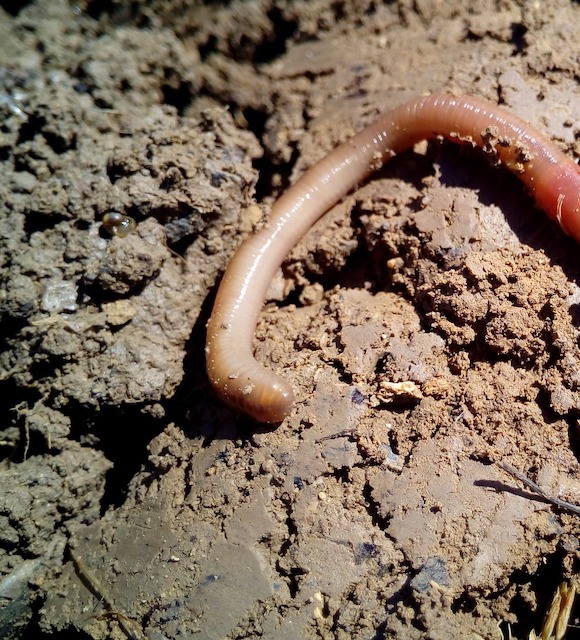
If you want a few new worm friends in your home, I suggest trying out vermicompost! The worms will break down your food waste right inside your apartment; however, note that the worms can’t turn everything into compost (ex. meat, seafood). So, if you aren’t a vegetarian this will not reduce all of your food waste. I’ve heard that vermicompost is most people’s go to choice in apartments; you don’t have to turn/mix the compost and can just leave the box of worms to do its thing. You can buy whole vermicompost sets on Amazon for $75-200 (affiliate link)!

A picture of a worm in a vermicompost bin

Use an Effective Microogranism System

Worms may not be your thing, and I totally get that! Never fear, there are worm-free systems that are about half the price of vermicompost sets. For about $50 you can get a Bokashi system that uses microorganisms to break down your food waste (affiliate link). But, these systems are supposed to be transfered to a larger composting system (like vermicompost or outside compost bins); it might be smart to locate a friend who will take your compost once the bin gets full!

Tumbler Composting

If you are lucky enough to have a balcony or outdoor space, then I suggest getting a bigger composting bin that can be stored out there! You can get a bunch of different bins, but make sure you will be able to easily turn or mix the compost inside to keep it full of oxygen.

Overall, composting in an apartment isn’t that difficult to do. It might require some research and learning when you first start out, but the end result is amazing. I feel much happier when I toss my vegetable scraps into a compost bin than if I were to throw it into the trash. 🌎❀️ Do you compost??

How to compost in an apartment pinterest pin
Pin now to read later!

Love,
Jenna β™₯

➑️ Subscribe toΒ never miss a post! ⬅️

Loading