bookmark_borderShould I Get a Menstrual Cup? – Pros and Cons

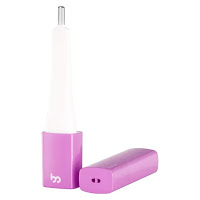
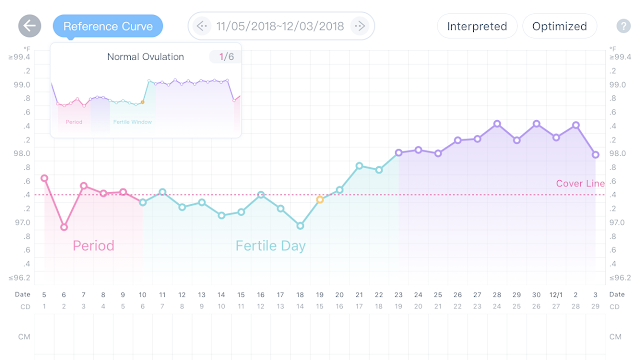
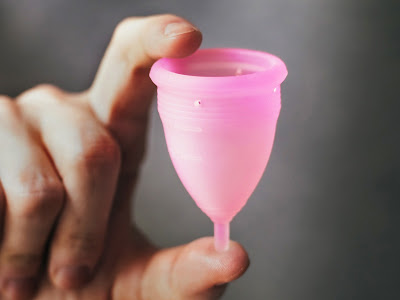
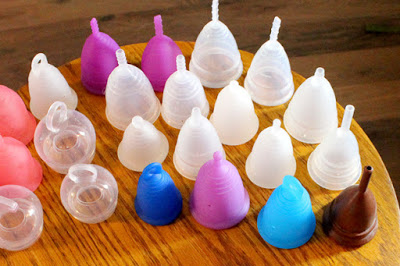
Hey earth muffins! As I use a natural form of birth control, I am still plagued by my period every month. 😬 While I wouldn’t say it is the highlight of my month, I am grateful that my cycle is almost always regular/predictable using my Femometer. Ever since the start of my journey towards zero waste, I have been toying with the idea of getting a menstrual cup as it has been one of my major failures so far… I still have not made up my mind yet, so I wanted to share my personal pros and cons of using a menstrual cup with you all today! 👍

Pros
~Saves A LOT of waste: Just think about how many pads/tampons you use during one cycle of your period… And then multiple that by 12 months…. And then however many years you have had your period. That is a TON of waste. A menstrual cup is a great reusable alternative that diverts waste from heading to the landfill (and thus, damaging the planet).

~Less money!: While one menstrual cup might seem a bit pricey (they are usually around $40), they last for multiple years… Which will save you $$!

~Needs less attention throughout your period: Instead of having to change your pads/tampons throughout the day, a menstrual cup can stay in for 12 hours. That is a lot of time that you don’t need to worry about any leakages!

~More natural and free from chemicals: Did you know that our periods only smell because of the chemicals in our pads/tampons and the fact that the blood is exposed to the air? Learning that fact made me want to switch to a cup right away, as I am always down for cutting back on the chemicals that are exposed to my body. Plus, smelling nice is always a bonus 😛

~Easy to use: You basically just insert it like you would with a tampon, which makes it easy for anyone to use!

~Easy to sanitize: After each cycle, you can sanitize your cup by boiling it water (but not for too long or the plastic could warp!).

Cons
~Easy to insert and remove?: While I say it is “easy to use” in theory, I am pretty sure it would take me quite a bit of time to figure out how to use it… I am also pretty scared that I might have an issue removing the cup… But, I definitely think that I would be able to learn how to insert and remove it correctly!

~A bit more messy: When you change your menstrual cup, you need to dump out the blood into the toilet, wash it, and then re-insert. This is one of the main reasons I haven’t purchased one yet, as I currently live in a dorm with public restrooms. I think it would be difficult to change/clean the cup if you don’t have your own place with your own bathrooms. 😬

~Can mess with implants/IUDs: While this doesn’t pertain to me (as I use the Femometer as my birth control method!), I thought I would include this for others. Apparently, if you have an IUD or another implant in, a menstrual cup can mess with the strings and can possibly pull it down from where it is supposed to be… Just talk to your doctor to make sure using a menstrual cup is a good idea!

~Hard to find the right fit?: There are a bunch of different types of cups, and some people have a hard time finding one that gives them the right fit… I suggest lots of research beforehand!

What are some pros and cons of using a menstrual cup that I missed?

Love,
Jenna ♥

➡️ Subscribe to never miss a post! ⬅️

Loading

bookmark_borderCharcoal Tooth Powder ft. Primal Pit Paste! 😁

Hey earth muffins! My journey towards living zero waste has introduced me to so many great companies along the way… I’ve actually been astounded by how many firms are starting to create products that are both natural/chemical-free (and therefore good for your body!) and create less waste. After writing about my failures to find a zero waste deodorant in this post, I stumbled upon Primal Pit Paste (now known as Pretty Frank). Not only does this company create deodorants in glass containers (aka super low waste!), it also has a bunch of other products like tooth powders.

I decided that I wanted to test out one of their deodorants, their Tough Teeth toothpaste powder, and their Charcoal Whitening tooth powder. As I am waiting until my current deodorant and toothpaste runs out to try those first two products (yay for not wasting products 😉), I thought I would share my experience with the Charcoal Whitening tooth powder with you all today! Let’s get right into it! 🎉

First off, the glass container that the powder comes in is actually larger than I expected – there is so much product in it for only $11! Shipment was extremely fast and the box (and the brown paper package filler) were all recyclable. 🙌 The only downside that this packaging has is that the glass container was wrapped in a huge seal of plastic… While I know this is to make sure no precious powder gets out in the mail, I was just hoping that this product would be fully zero waste.

Overall, this product was SUPER easy to use – and it definitely worked! All you need to do is wet a toothbrush, scoop some of the powder onto the brush, brush your teeth until they are coated, let it sit for two minutes, and then brush/rinse away the powder. As the main whitening ingredient is activated charcoal, your teeth turn a hilarious shade of black which is the perfect opportunity to snap a photo and send to your friends (I may or may not be guilty of that 😝).

Before using this product, I was interested to see if I would be able to tell if it was working or not… And you definitely can! The first time you use it your mouth feels tingly as the product ingredients start working, which is a great way to know that something is actually going on! However, as there are only 8 ingredients in the powder it gives you a sense of relief that you aren’t damaging your teeth/gums/mouth like other chemical whitening procedures (which tend to be quite painful). Plus, I actually have noticed a difference in the color of my teeth! My teeth were never extremely yellow or anything, but they are definitely more white now!

To sum up, I would definitely recommend this product if you are looking for some sort of natural teeth whitening solution! I have been using it about 2-3 times a week to start out, but you can use it more or less as needed. 😀 For the price, the results, and the low waste product itself, Primal Pit Paste definitely created a win with this sustainable charcoal tooth powder! 🎉

Would you ever try a whitening tooth powder?

*The Primal Pit Paste products were sent to me for free, but all opinions are my own! 🙂*

Love,
Jenna ♥

➡️ Subscribe to never miss a post! ⬅️

Loading

bookmark_borderThe Misconceptions About Living “Zero Waste”

Hey earth muffins! Even though my journey towards living a zero waste lifestyle started less than a year ago, I have heard so many misconceptions about being “zero waste” from friends, family, and strangers when I talk about my progress! While this isn’t surprising (as many people aren’t familiar with the concept of living without making waste), I thought it would be informative to share some of
the most common things I have heard to dispel some of the major rumors. 😀 Let’s jump right into it!

1. Most “zero wasters” DO make trash – Being absolutely zero waste is quite the feat, so many people aim to be as zero waste as possible… But yes, this does mean trash is created! And no, this does not mean that people aren’t real or good “zero wasters” if they create some waste. The whole point of the lifestyle is to limit your trash output as much as possible! 👍

2. The mason jar trash can is not ideal for everyone – I have seen so many articles about that one girl/guy in the inner city who is able to fit all their trash from the past twelve years in a mason jar… Good for them (because that is quite the feat!), but that is not the end goal for everyone who calls themselves “zero waste”.

3. Being zero waste is “weird” or people will look at you differently – Again, maybe they will… But I have only been met with positive reactions when I ask for a drink without a straw or bring my own bag into a store. People are generally interested and even excited to learn about what lifestyle I am trying to live. If your friends judge your for trying to help the planet are they truly your friends?

4. You don’t need to throw everything away and buy zero waste alternatives – That is actually quite the opposite of the lifestyle! Many Instagram photos romanticize the collections of zero waste products that a true zero waster should have, but the whole point is to make the belongings you have right now last until they NEED to be replaced. At that point you can then buy into products with the sustainable aesthetic.

5. It takes too much time to be zero waste – It takes time to do anything right? But as soon as you change your habits to be more sustainable, you spend the same amount of time doing the things you have always been doing (minus the endless hours spent retail shopping but that I personally haven’t missed 😉)!

6. The zero waste lifestyle costs more money – I mean, it could be if you make it that way (I guess) but I have found the opposite! From shopping in bulk bins and thrift stores to reducing my spending on clutter in the home, I have saved a bunch of $$$ already.

7. One person being zero waste can’t make a difference – WRONG. Because of my actions my family, friends, and even strangers are more likely to re-think their choices. I’ve seen those around me make small improvements to be more sustainable, and in my eyes, baby steps are still steps! ❤

What other misconceptions have you heard about the zero waste community?

Love,
Jenna ♥

➡️ Subscribe to never miss a post! ⬅️

Loading

bookmark_borderReview: Clean Faced Cosmetics Foundation Powder

Hey earth muffins! I posted on my Instagram recently that I purchased the Clean-Faced Cosmetics Foundation Powder in the shade “Light”. After using their zero waste mascara religiously, I thought that I should try out their powder and see how I like it to continue on my journey towards zero waste. After using it for a month or so, I wanted to share my thoughts with you all today 😃

Pros:
~Keeps me matte almost all day: I was worried that a natural product wouldn’t work like a “normal” powder, but this keeps my skin matte almost all day! 👍 It definitely does his job!
~Perfect amount of coverage: I don’t like a lot of coverage, so this powder is the perfect one for me. If you are used to a lot of coverage I would suggest using a foundation as well, but it can definitely be used by itself.
~Made with wayyyyy less ingredients/chemicals: This powder has three components (kaolin, tapioca starch, and cocoa powder) versus the 27 in the Neutrogena Skin Clearing Mineral Powder (aka the old powder I used to use).
~Feels better on my skin: I don’t know if it was the Neutrogena powder specifically, but my skin never felt that great when I was wearing powder. My pores felt suffocated, so I am so happy that this one feels so light on my face! 🎉
~Price: You literally cannot go wrong with a powder that is less than $10!!!
~Doesn’t break me out: Maybe this goes back to the pores being suffocated, but this powder helps keep my skin clear (which I of course appreciate!). I have had sensitive skin my whole life, so it was super exciting that I found a powder that doesn’t make me breakout.

Cons:
~A bit tricky to use: The powder is loose and comes in a metal tin which makes it a bit difficult to use. However, after you figure out the way that works for you this isn’t an issue at all. 😁
~Often lose product when you open the tin: Again, this goes back to how it is packaged… Especially if you travel and the powder gets moved around, you will lose a bit of powder when you open the tin. To counter this, I have found that hitting it on the counter a few times allows it to settle.

Overall, I would definitely suggest you check out the Powder Foundation from Clean-Faced Cosmetics! I think it is an excellent powder in general AND you get to be sustainable while using it (truly a win win)!

^Laura, the Etsy shop owner

What powder do you use? 

Love,
Jenna ♥

➡️ Subscribe to never miss a post! ⬅️

Loading

bookmark_borderBirth Control: What is the Basal Body Temperature Method?

Hey earth muffins! If you have been following my Birth Control series, you will know that I have been using the basal body temperature (BBT) method to track my menstrual cycle. Using the Femometer has been the easiest way for me to use this method. In this post, I will be sharing everything there is to know about BBT for anyone who is considering trying out natural birth control. Let’s jump right into it! 😘

What is the Basal Body Temperature Method?

The Basal Body Temperature method (or BBT) is a form of natural birth control. This method of pregnancy prevention uses your basal body temperature to chart your menstrual cycle. Your “basal body temperature” is your body’s lowest temperature that is attained when you are asleep. In order to get the temperature closest to this, the BBT method is based around measuring your temperature as soon as you wake up. This natural birth control method is based off the fact that your body temperature will decrease slightly when you are ovulating.


How do you use the BBT Method?

The BBT method is extremely easy to do:

  1. Buy a thermometer that has at least two decimal places after the degrees (see next section for the thermometers I recommend!)
  2. Place the thermometer right beside your bed. It MUST be within arms reach as you cannot sit/get up to retrieve the thermometer
  3. When you wake up in the morning, immediately take your temperature! Again, in order to get the best reading you must remain lying down when you do this.
  4. Depending on the type of thermometer you have, either log the temperature in a journal/chart or sync it to the app on your phone.
  5. Repeat each morning!

What thermometer should you use?

I personally have loved my experience with the Femometer! Instead of having to track all of my temperatures by hand, this thermometer syncs up to an app on my phone. This allows me to see my chart any time I want to, as well as have a digital back up online. It also predicts your next cycle, which allows you to know what days you should abstain from having sex (or when you should use another form of birth control).

If you don’t want to invest in the Femometer right away (it is $40), any thermometer with at least two decimal places will do. Try to find a brand that is reliable, as you don’t want any faulty readings!

What will your chart look like? 

One of my favorite parts of using the BBT method is seeing how my cycle actually goes through a cycle each month! The cycle chart on the Femometer app is super intuitive, and it even allows you to compare your chart to the “normal” cycle.

This image is my cycle compared to the reference curve in the top left:

As you can tell, it is super interesting to watch the slight variations in temperature that allows me to know exactly when my period is going to be starting! If you are using a regular thermometer, you can track your own temps using a chart like this:

Just search blank BBT chart into Google to find a bunch of these!

What are the risks of using this method?

1. Your temperature can be affected by many other things (such as illness, stress, alcohol, etc.) which can skew your readings.

2. Again, if you use a regular thermometer you will only be able to track what has already happened in your cycle… This mean you will be guessing when your next ovulation/fertility period is, which can lead to unwanted pregnancies if you are not careful! (If you want to avoid this, then I suggest investing in the Femometer!)

What are your thoughts on the basal body temperature method?

P.S. This post was not sponsored by the Femometer. I was sent the product and have fallen in love with it, thus the many references to it. 😀♥

Love,
Jenna ♥

➡️ Subscribe to never miss a post! ⬅️

Loading

bookmark_borderThe Ultimate Guide to Meal Prepping!

It seems like meal prepping is always on my Pinterest feed, so over the summer I decided to try my hand at it… I think meal preps are the perfect way to ensure that you are eating healthy foods regardless of how much time you have to cook lunch/dinner, so I would definitely recommend trying it out sometime! 🍽 If you have any questions about anything regarding meal prepping, look no further because I have the Meal Prep 101 guide in store for you all today. Let’s get started!

Step 1: Figure out a day and time that you will do your meal prepping – I personally liked to do it on Sundays after lunch, as it allowed me to get everything cooked and ready before dinner (thus, giving me the whole night off to enjoy before work the next morning).

Step 2: Find the containers you will be using – Before you start cooking, I suggest finding all the containers you will need. There are many options:

  • Bento boxes – These containers are perfect for meal prepping and come in plastic (try to be sustainable and avoid!), wood, and metal/stainless steel. 
  • Stainless steel tupperware – As part of my journey towards zero waste, I bought a set of stainless steel tupperware to use for meal prepping, takeout, and storing leftover food. 
  • Mason jars – Easy for one dish meals (like stir fry, fried rice, etc.), salads, and yogurt.
  • Reusable sandwich bags – I mentioned trying to replace Ziploc bags in my post about plastic alternatives, and I love my reusable sandwich bags! 
  • Plastic tupperware – While these aren’t the sustainable choice, most people have them already in their kitchens… Do what is easiest for you! 
Step 3: Plan out what foods you will want to make – This depends totally on what you want to eat for the days you are meal prepping! If you don’t have any good recipes in mind, I would recommend looking through Pinterest… But, make sure you remember that meal prep doesn’t need to be fancy – prepare the foods you would usually cook! Here is my formula for the perfectly prepped meal:
 
Protein (meat, tofu, beans, etc.) + Carbs (grains, rice, bread, etc.) + Vegetable + Something sweet (try fruit instead of baked goods!) 
= The meal prep of perfection
 
If you think you will be hungry, try adding some sort of snacky food as well (nuts, pretzels, anything else from bulk bins)! 
 
 
Step 4: Actually cook the food – This will take however long each component of your meal takes to cook. 😃
 
Step 5: Put the food into your containers and put into fridge/freezer until needed – After packaging up everything nicely, let cool for a bit before closing the lids (this will prevent steam from making anything soggy). I put half of my meals into the fridge for the upcoming days, and the other in the freezer to take out mid-week… Do what works best for you (which also depends on how many days you meal prepped)! 
 
Step 6: When ready to eat, heat up in microwave/over the stove. Enjoy! – I hope your meal prepping has allowed you to enjoy healthier meals without the stress of trying to cook right after getting home from work. 👍
 
What are your tips and tricks for meal prepping?
 
Feel free to pin this to save it for later! 
 

Love,
Jenna ♥

➡️ Subscribe to never miss a post! ⬅️

Loading

bookmark_borderReview: LUSH Jumping Juniper Shampoo Bar

Hey earth muffins, I hope everyone is having a great week so far! 😍 As part of my journey towards zero waste, I have recently been switching out my bathroom essentials to products that are more sustainable… Recently, I swapped out my shampoo to the Lush Jumping Juniper shampoo bar. I was a bit wary of trying a new shampoo, as my scalp produces this weird oily substance that is hard to maintain. I had been using Paul Mitchell’s Tea Tree Shampoo ever since I was in 6th grade, and this product was able to at least control my scalp a little bit.

When I was looking to find a more sustainable alternative, I immediately knew I wanted to try a shampoo bar from LUSH. When looking through their “flavors”, I decided to buy the Jumping Juniper one that is aimed to “sort out oily hair problems by washing away grease and managing oil production”. I have been using it for about a month now, so I thought I would share the pros and cons of the product. 👍

Pros:
~Works great on my scalp: While I thought the Tea Tree shampoo had been helping my hair, it clearly was not doing that great because this bar does an excellent job of washing away ALL the oil! I was actually blown away the first time I used it, and the oil has still been controlled after using it for a month.
~Smells great: I can’t place what this bar smells like (I am pretty sure it is some sort of candy or dessert), but it smells amazing regardless. Sometimes heavily scented things can irritate my nose, but this one has just the perfect amount of scent to it.
~Easy to use: I actually love how easy this is to use! You basically just use it as you would with any bar of soap (get the bar wet, lather it up, and lather your head!)
~Looks ascetically pleasing: Who wants a brightly colored plastic bottle in their shower? Not me! I love how simple naked products are 😃
~Sustainable: Because this has no packaging, it is definitely a great sustainable alternative. I would recommend giving it a try!

Cons:
~It is difficult to keep the bar dry: To last for all 80 washes (which is how many washes the website say it will last for), it is essential to keep the bar dry when it is not in use. I bought the round tin to hold this product, but I would recommend not storing it in this container unless you are traveling, as it doesn’t allow the bar to fully dry.

*Update: This shampoo bar lasted me a total of 98 washes!!! 😲 *

~Makes my hair full of static: This is a minor thing, and I am pretty sure that is the dry air of my dorm…
~Kinda pricey: One bar is $10.95, which means you will need about 5 bars per year (if you wash your hair every night). While $55ish isn’t that expensive for a whole year of shampooing, there are definitely cheaper options out there if you are concerned with price.

Overall, I think the LUSH Jumping Juniper shampoo bar is an excellent product, and I will continue to use it! ♥ Would you ever try out a shampoo bar?

Love,
Jenna ♥

➡️ Subscribe to never miss a post! ⬅️

Loading

bookmark_borderThe Best Places to Buy Sustainable Products!

As many of you know, I have been on a journey towards zero waste since May of 2018. If you also embark on a mission to live a more sustainable lifestyle, you might be curious about where I buy my sustainable products. Look no further – this post is dedicated to a list of my favorite places to shop! 😊 Let’s jump right into it!

1. Family and friends! – When you have a list of sustainable items you would like to buy (such as stainless steel containers, reusable produce bags, etc.), try to find them from people close to you! This will ensure that you get it for a better price (or even for free) and is best for the environment, as the product that they might not use will be heavily used by you instead of ending up in the landfill.

2. Freecycle (or Facebook Marketplace) – This is basically the same idea but with strangers in your town/city! If you don’t know what Freecycle.org is, it is a website where people can post things that they would like to get rid of. This stuff is all free, which is amazing, and it prevents perfectly good items heading to the landfill. In my city there is currently a dining room table, TV, firewood, etc. being offered.

3. Amazon – When I first started my journey, I was looking for many products to replace the plastic or unsustainable ones in my life. I found that Amazon sells almost all kinds of stainless steel, bamboo, and other sustainable products that you can think of… It is definitely a great place to start to at least understand how much certain things will cost you! If you plan on buying a lot from Amazon, I would recommend making a list and buying everything at once, which will reduce the amount of environmental impact when it comes to shipping materials and carbon used for shipping.

4. Ebay – Like Amazon, this website has some great sustainable products, but I like Ebay because you can buy more things used… Again, this prevents any excess waste from going into the landfill (but make sure you try to avoid as much shipping pollution as possible!).

5. Thrift stores – After looking for a product on Amazon and Ebay, why not try to find it in your local thrift shops? I am a huge promoter of the Salvation Army, but you should be able to score some great finds where ever you go! Hint hint – thrift stores tend to carry lots and lots of glass containers for a perfect zero waste pantry!

6. Yard sales – Just like the thrift store, yards sales are a great place to find great deals.

7. Craigslist – I never usually use Craigslist (as I have been able to find sustainable goods from the above places), but it is another way to find products close to you for decent prices. Make sure you don’t meet people at their home or sketchy locations!

8. Zero waste/plastic free websites – There are a bunch of websites that specialize in sustainable products that will even use as little packaging as possible. Here are some of my faves:


Where do you like to purchase sustainable goods?

Love,
Jenna ♥

➡️ Subscribe to never miss a post! ⬅️

Loading