
Hey earth muffins! I shared on my Instagram a couple of weeks ago that I recently worked on a DIY upcycled craft project. I haven’t done a craft project in SO long! During middle and high school, I used to craft all the time. I loved to sculpt charms out of polymer clay and make my own jewelry. But, I eventually stopped doing that and would occasionally do some painting projects. In college I was really into following along with Bob Ross videos! It has been quite a while since I’ve done some crafting, but I just couldn’t pass up this opportunity for a fun DIY upcycled project. Let’s jump right into it!

From Trash to DIY
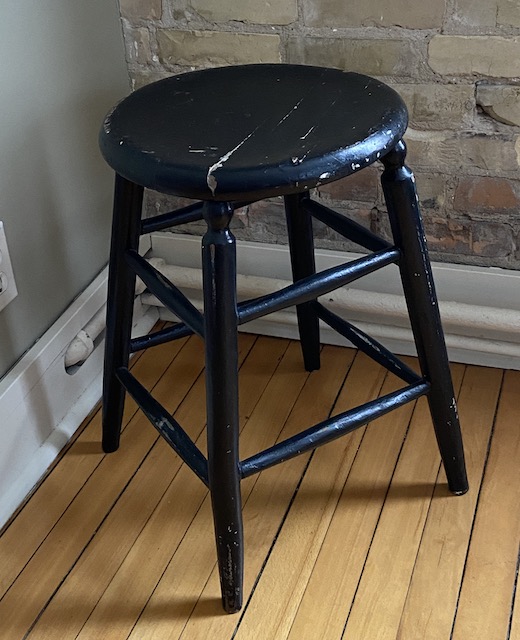
As many of you know, I currently live in an apartment complex. There are two main staircases in this building – one near the elevator and another tucked away for access to the basement/laundry room. When I was going down to do laundry one day, I noticed that someone had placed a stool and some towels in the back staircase. I figured someone had moved out and left them there. While I wanted to take the stool for this upcycled project, I didn’t want to steal something from someone who still wanted it. But, a month later, they were still there. So, I brought the stool upstairs to start my project!
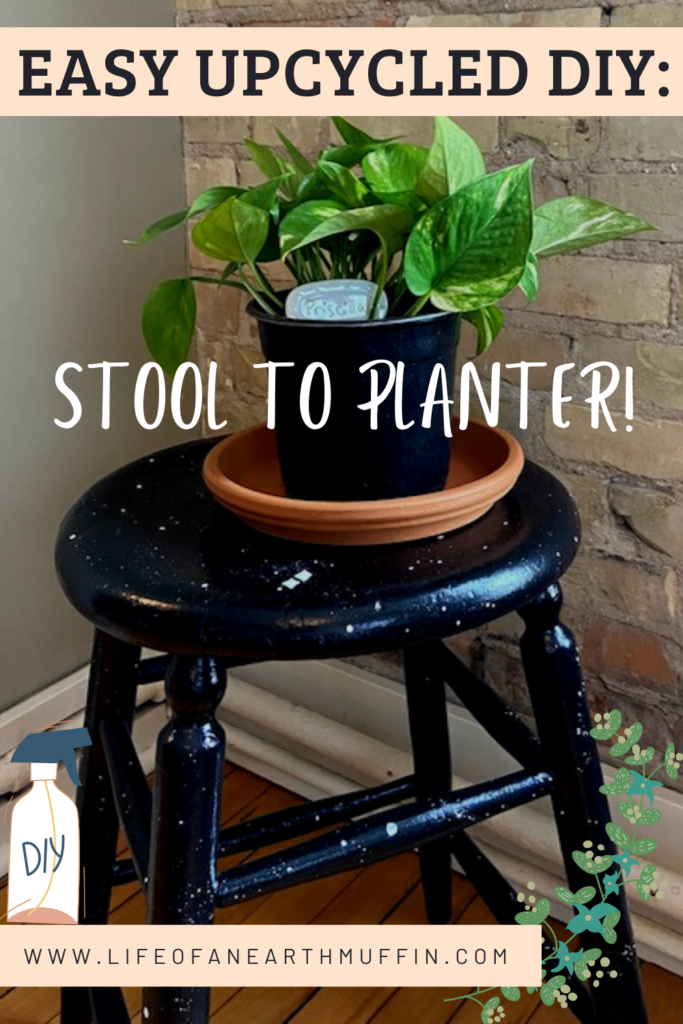
There is one corner of my living room that had nothing in it. Our apartment doesn’t have AC, so we had a floor AC unit there during the warmer months. As it is obviously winter now, the unit is in storage which left behind empty space. I have been thinking about what I should put there for quite some time… The corner is by an east facing window too, so I thought it would be perfect for a plant!
What You Need for This Upcycle DIY
-An old stool: this one was in pretty rough shape, but I won’t actually be sitting in it anytime soon
-Paint: I used black and white
-Paintbrush 🖌️: I realized that I didn’t actually have a large enough paint brush… I didn’t want to buy a new one, so I used an old piece of foam as a sponge brush! It worked surprisingly well!
-Newspaper/cardboard to protect the floor: I used some from my recycle bin!
-A cute design idea: I was aiming for space themed, but there are so many cute options to try!
How to Upcycle a Stool
- Lay out your newspaper to protect your floor. This step is important, especially if you tend to be a messy painter/DIYer
- Mix the paint and start painting! Like I said above, I didn’t actually have a paintbrush, so I had to use a “dab” method to cover the stool. This was totally fine for me because I was aiming for a space, imperfect look.
- For areas with old paint or cracks, let the first layer dry and then paint it again.
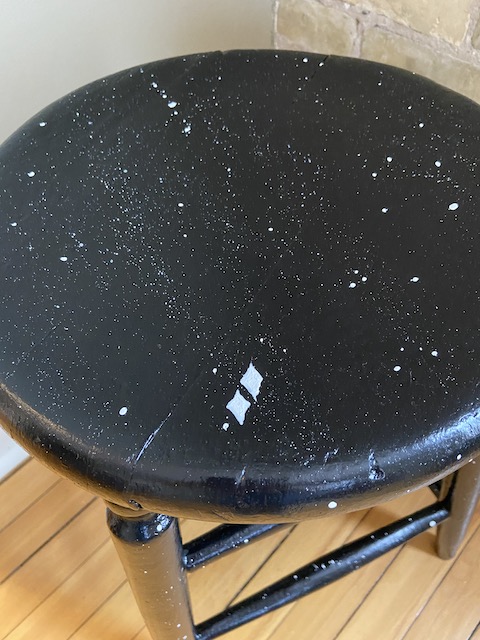
4. Once the base is on, let dry. Add any finishing details with other colors! I went in with white paint to create lots of stars, as well as two larger stars in the front of the stool.
The Finished DIY Upcyle
I absolutely love how this turned out! 😍 I think the subtle space theme is awesome, because it isn’t obvious until you really look at the planter. For Valentine’s Day, my boyfriend bought me a gorgeous Golden Pothos… I am excited to see how big it gets! Part of me wants to paint the terracotta pot too, but I am not sure if it will look good. Any thoughts if I should paint that as well? Overall, I am really happy with this DIY upcycled project. I love that I saved this stool from the landfill (and/or sitting in that dingy staircase), and I will definitely be keeping it for years to come!
Love,
Jenna ♥


You did a great job with painting this stool and now it looks just perfect for your plants.
Awww, thank you so much! I am so happy I made this DIY! 🙂
-Jenna
What a great idea!
Thank you so much, I was really excited when it turned out so cute!
Jenna ♥
I love this!! The finished effect is amazing as well x
I can never get rid of chairs/stools or small tables. I currently have 3 coffee tables of various sizes and one bar stool/chair living in my garage and a dining chair hidden in the wardrobe! You never know when a piece of furniture will come in useful and you’ve perfectly proved my point. You can move a little item like that around wherever it’s needed; an extra stool at the table, somewhere for a cup of tea and you’ve made yours look particularly pretty. Well done!
Thank you so much – I think it looks great too! 🙂 I’m so happy I was able to save something from the trash to make my living room look so much cuter.
Jenna ♥